
Product in App Store
Setting up your in-app subscriptions and purchases in App Store Connect
This page provides guidance on creating a product in App Store Connect. While this information may not directly pertain to Adapty's functionality, it serves as a valuable resource if you encounter challenges while creating products in your App Store Connect account.
To create a product that will be linked to Adapty:
-
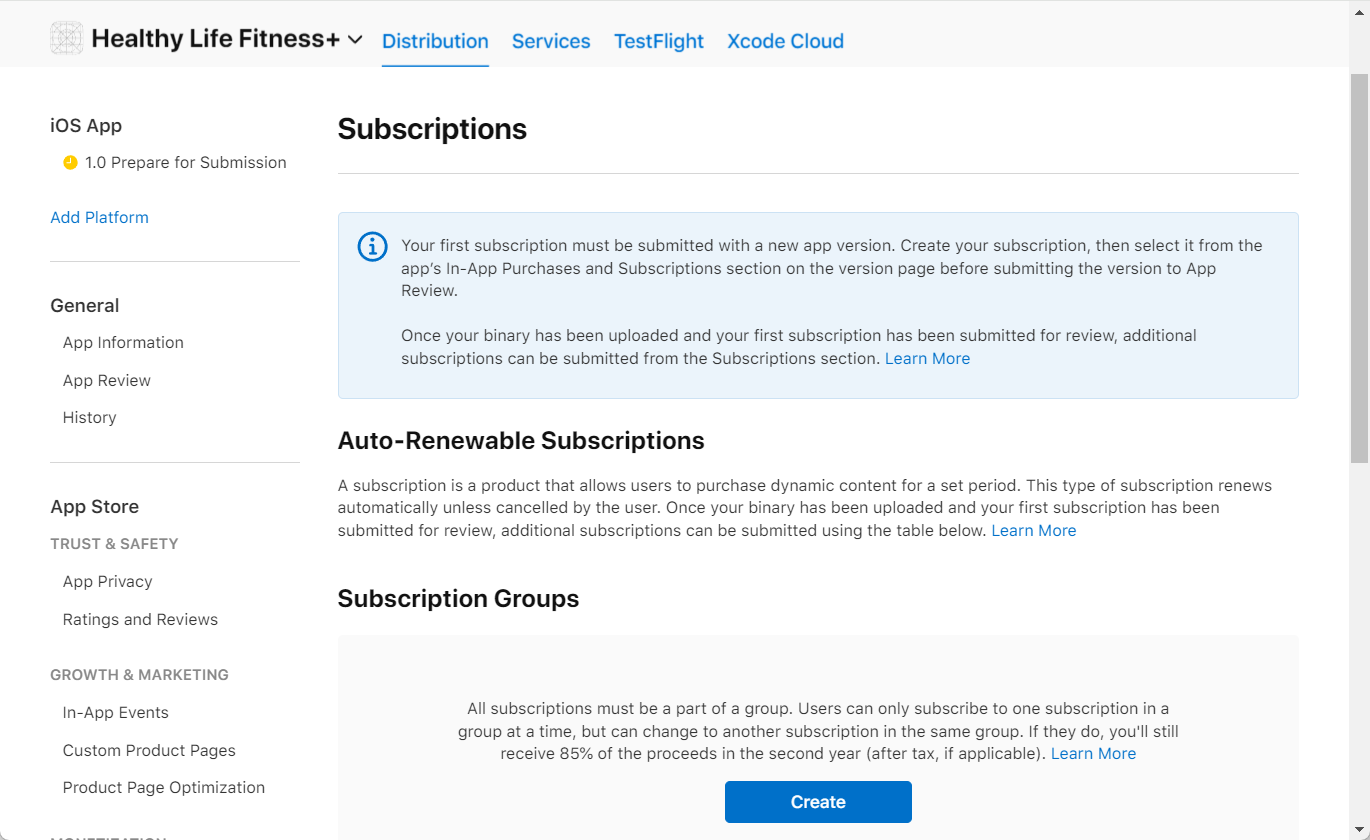
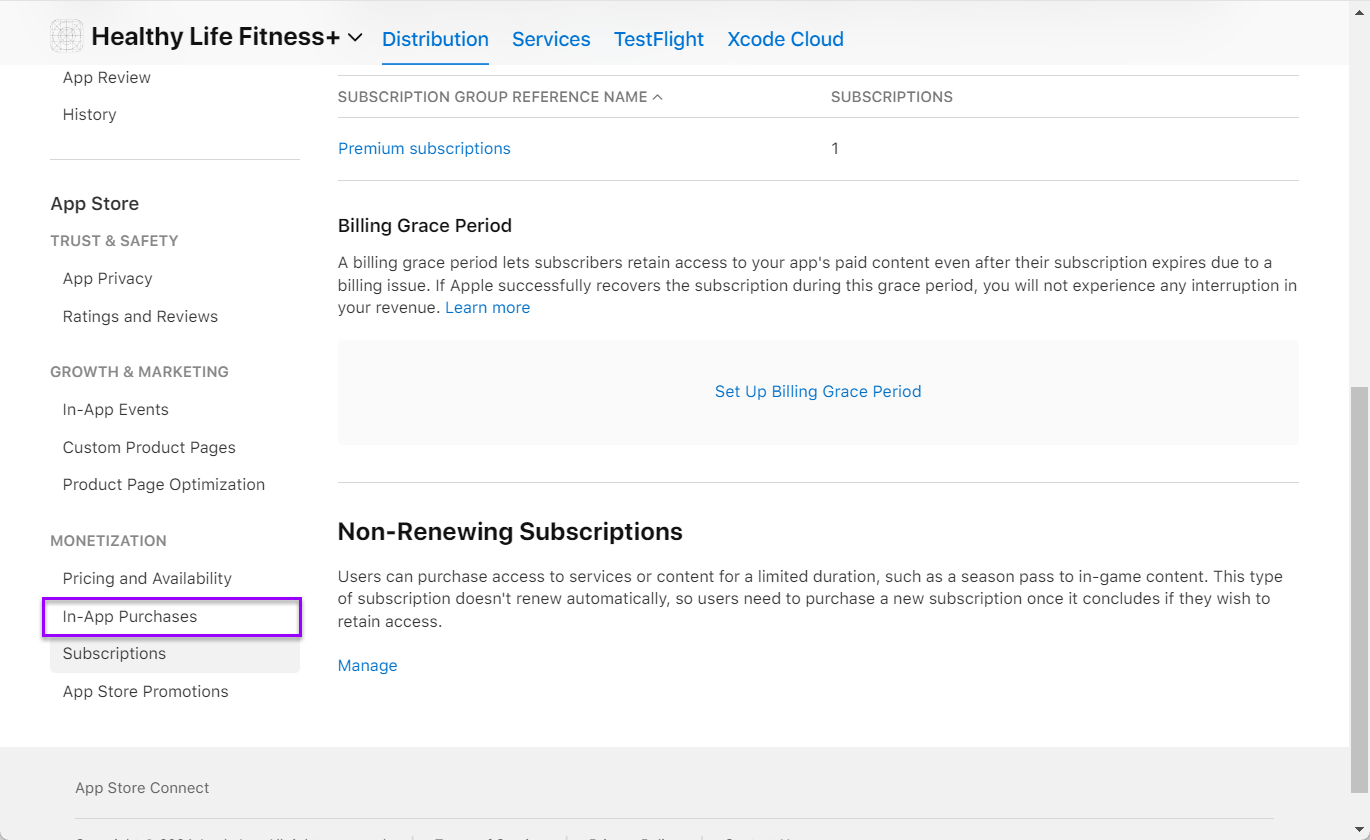
Open App Store Connect. Proceed to Monetization → Subscriptions section in the left-side menu.
-
If you haven't created a subscription group, click the Create button under the Subscription Groups title to initiate the process. Subscription Groups in App Store Connect categorize and manage your products, allowing users to switch between different offerings seamlessly. Note that it's not possible to create a subscription outside of a group.
-
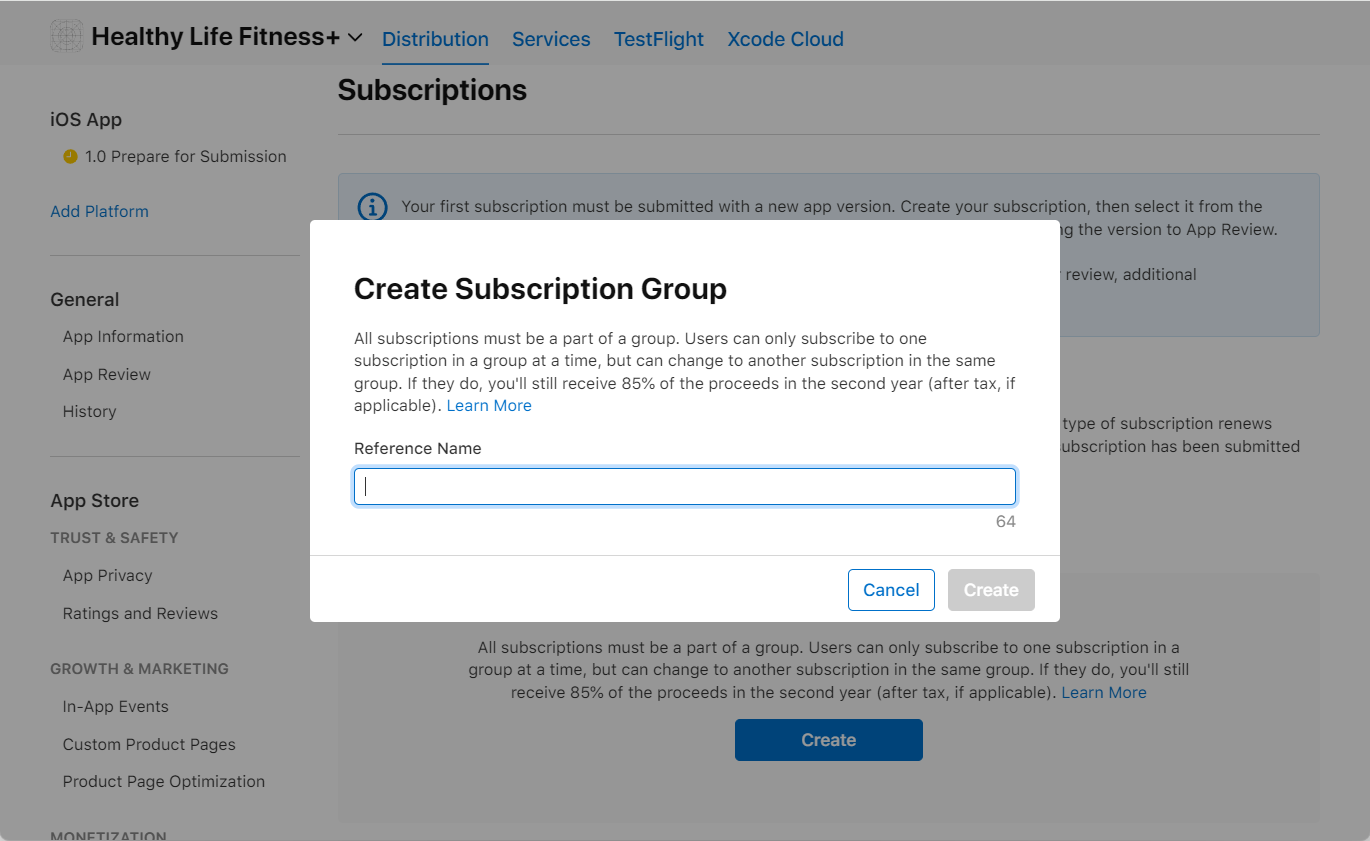
In the opened Create Subscription Group window, enter a the new subscription group name in the Reference Name field. The reference name is a user-defined label or identifier that helps you distinguish and manage different subscription groups within your app.
The reference name is not visible to users; it's primarily for your internal use and organization. It allows you to easily identify and refer to specific subscription groups when managing them within the App Store Connect interface. This can be particularly useful if you have multiple subscription offerings or want to categorize them in a way that makes sense for your app's structure.
-
Click the Create button to confirm the subscription group creation.
-
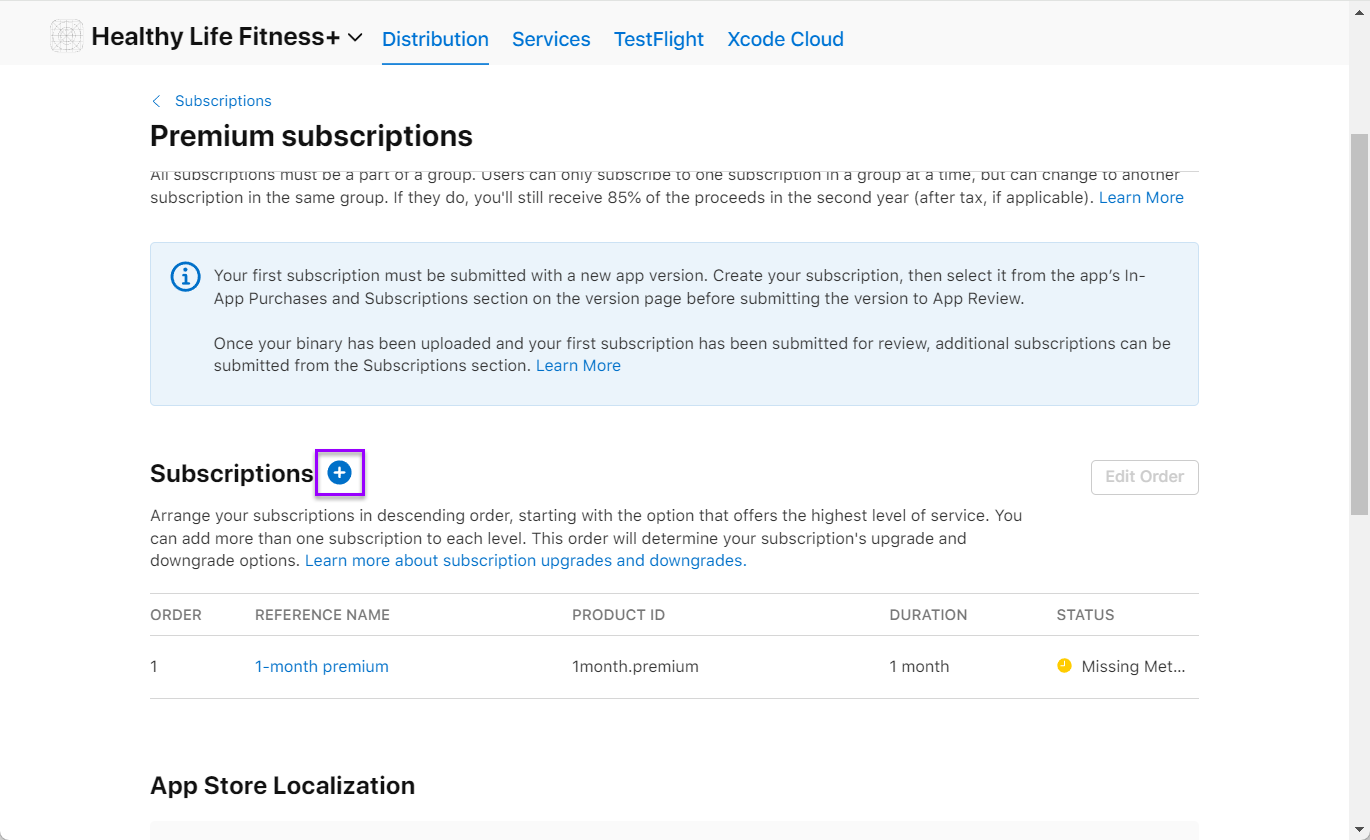
The subscription group is created and opened. Now you can create subscriptions in the group. Click the Create button under the Subscriptions title. If you add a new subscription to an existing group, then click a Plus button next to the Subscriptions title.
-
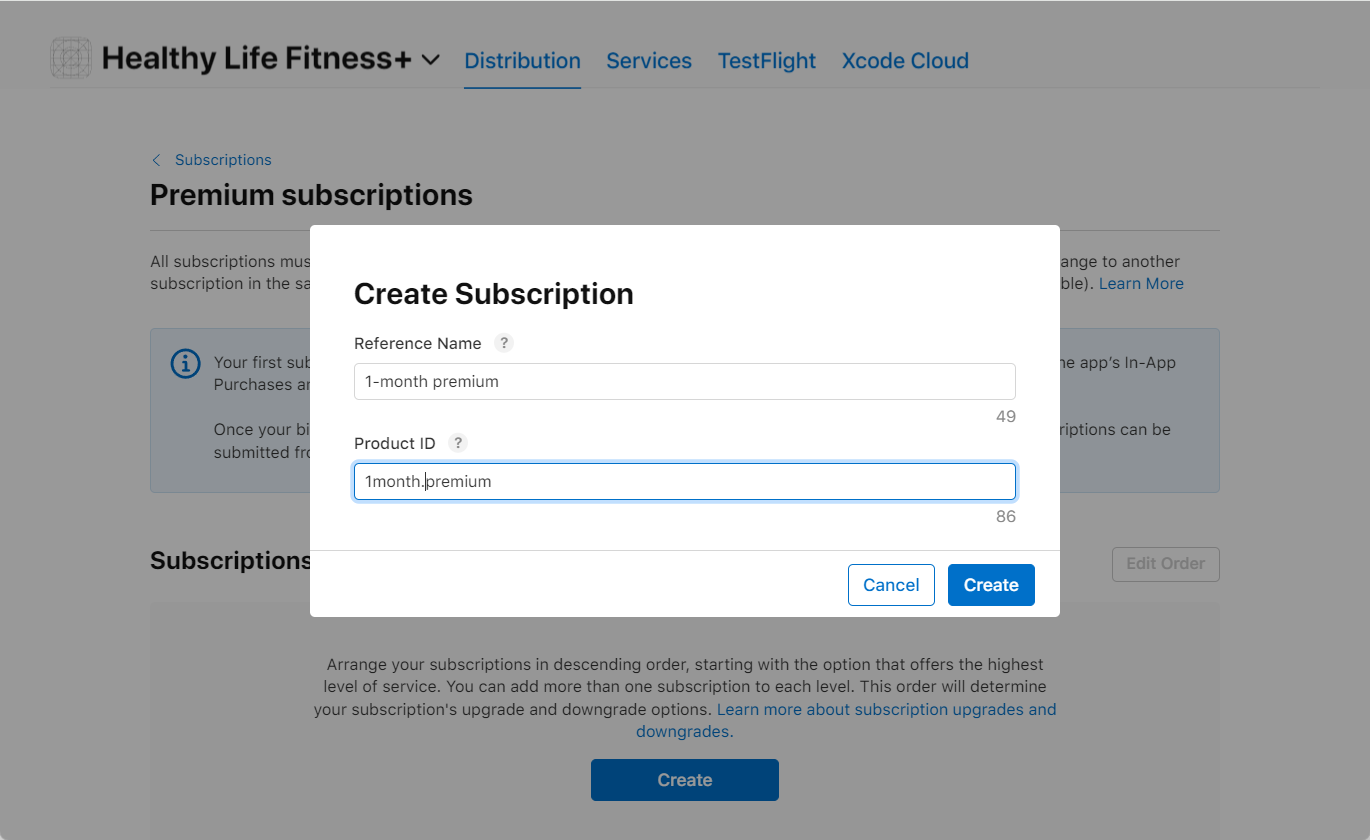
In the opened Create Subscription window, enter its name in the Reference Name field and subscription unique code in the Product ID field.
The Reference Name serves as an exclusive identifier within App Store Connect for your in-app subscription. It is not visible to your users on the App Store. We recommend using a clear, human-readable description that accurately represents the specific subscription you intend to create. Please note that this name must not exceed 64 characters in length.
The Product ID is a unique alphanumeric identifier essential for accessing your product during the development phase and synchronizing it with Adapty, a service designed to manage in-app subscriptions. Only alphanumeric characters, periods, and underscores are allowed in the Product ID.
-
Click the Create button to confirm the subscription creation.
-
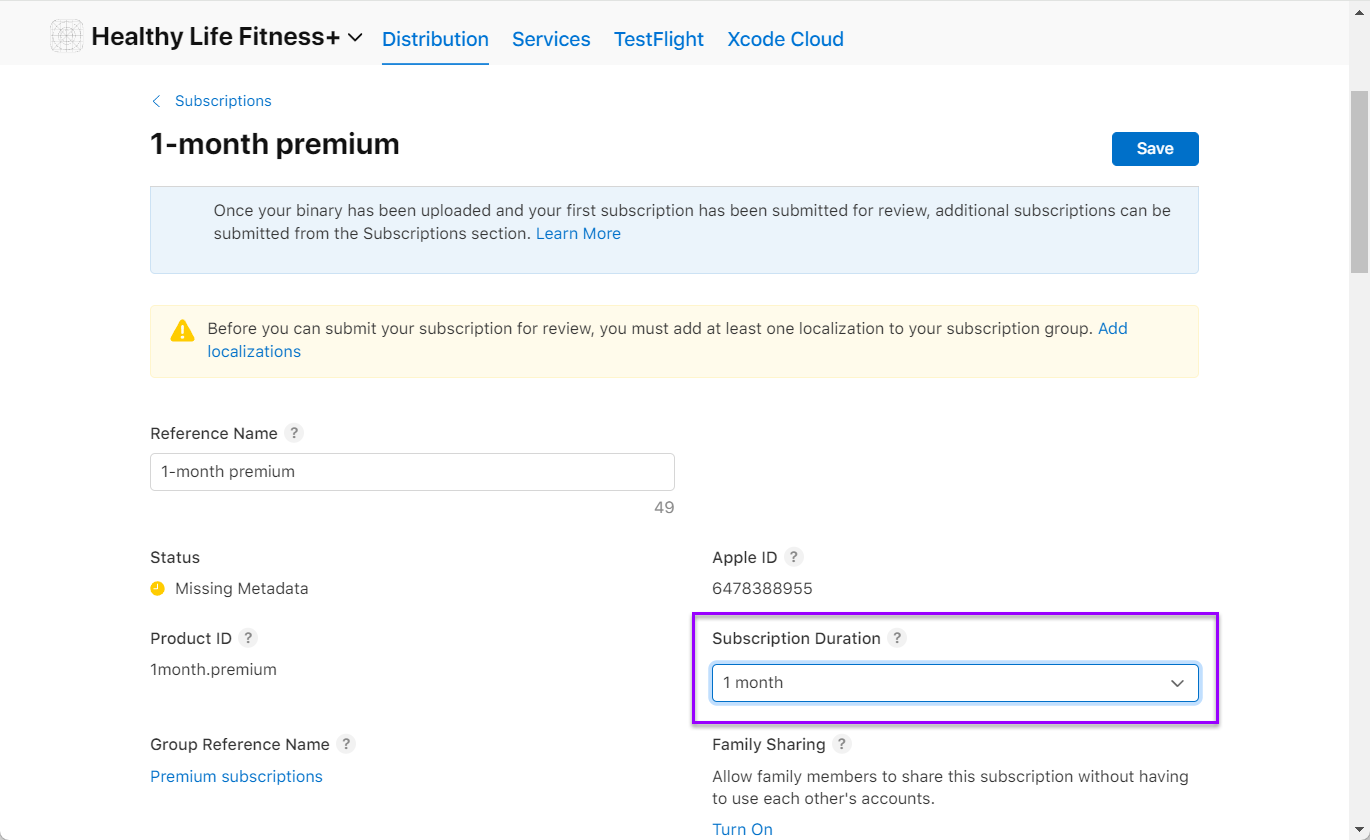
The subscription is created and opened. Now select the duration of the subscription in the Subscription Duration list. Even if the subscription duration is already indicated in the subscription name, remember to complete the Subscription Duration field.
-
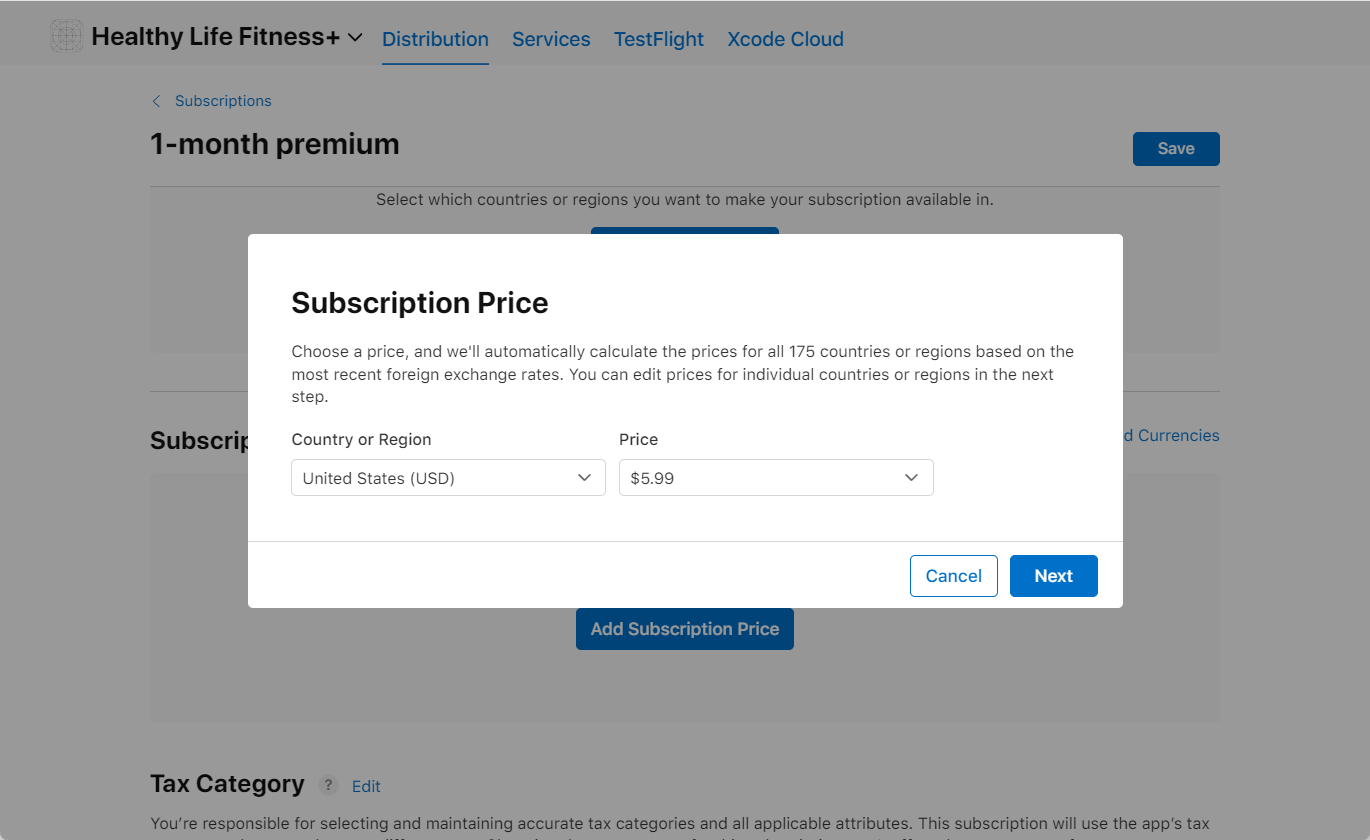
Now it's time to set up the subscription price. To do so, click the Add Subscription Price button under the Subscription Prices title. You may need to scroll down to find them.
-
In the opened Subscription Price window, select the basic country in the Country or Region list and and basic currency in the Price list. Later Apple will automatically calculate the prices for all 175 countries or regions based on this basic price and the most recent foreign exchange rates.
-
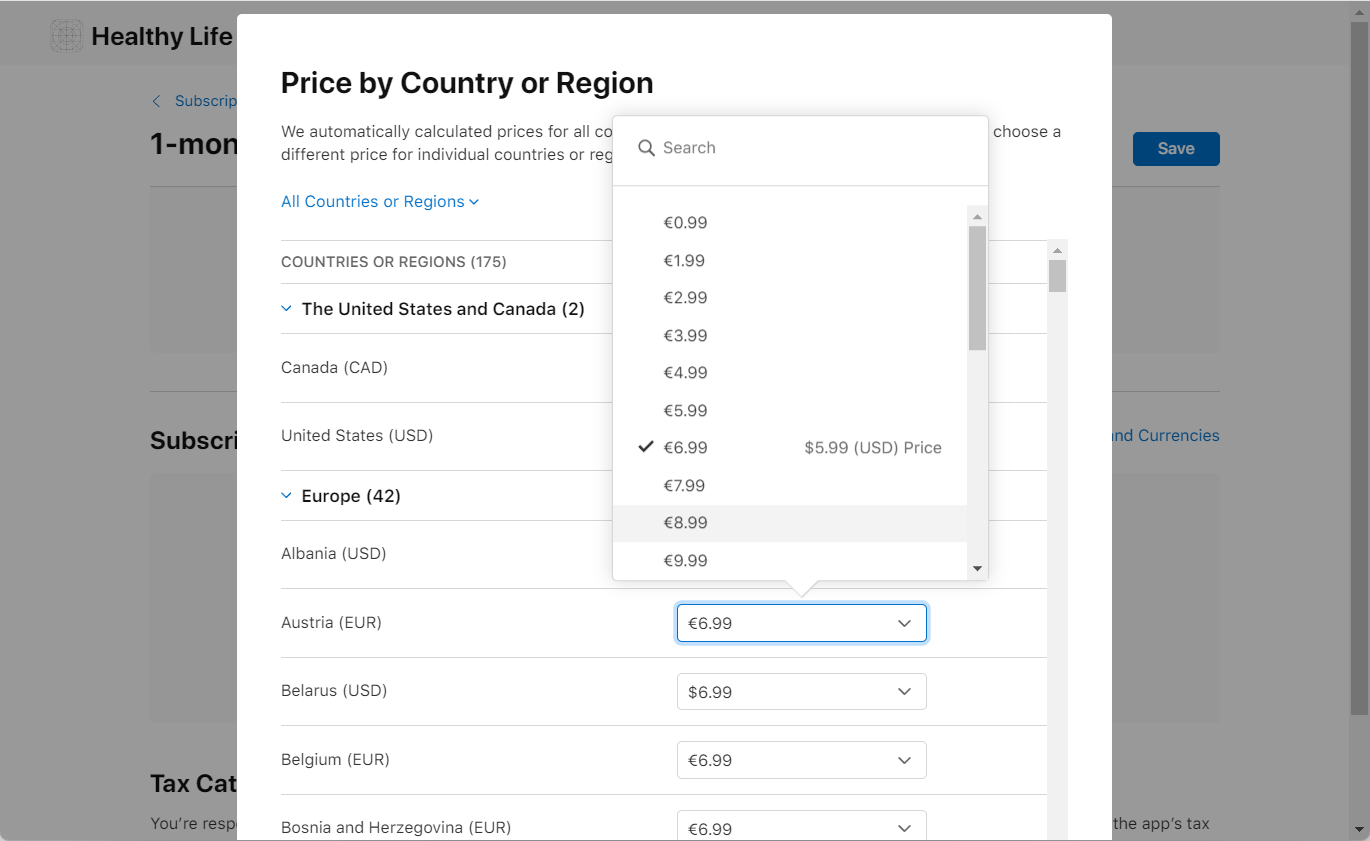
Click the Next button. In the opened Price by Country or Region window, you see the automatically recalculated prices for all countries. You can change them if you want.
-
After updating regional prices, proceed by clicking the Next button at the bottom of the window.
-
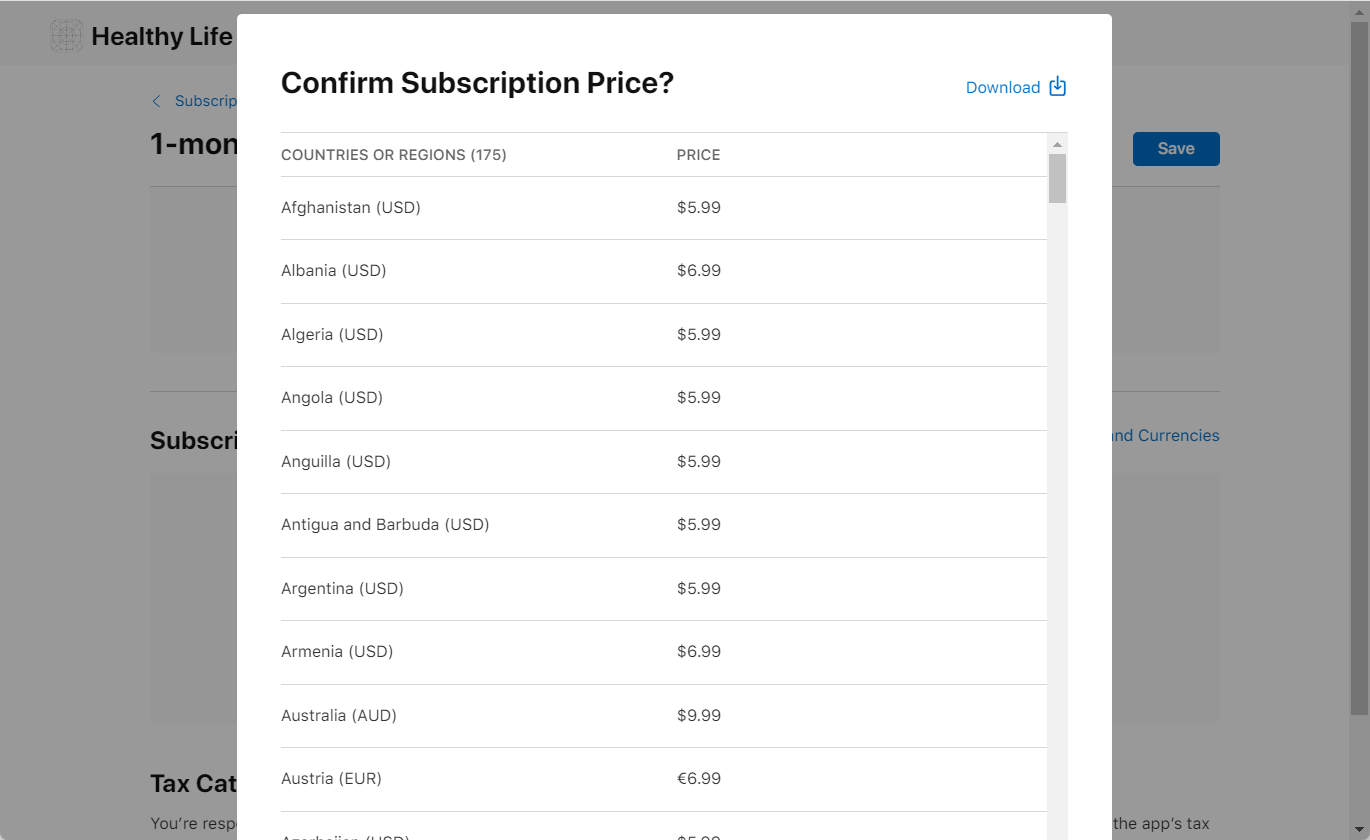
In the opened Confirm Subscription Price? window, carefully review the final prices. To correct the prices, you can click the Back button to return to the Price by Country or Region window and update them. When you are ok with the prices, click the Confirm button.
- After closing the Confirm Subscription Price? window, remember to click the Save button in your subscription window. Without it, the subscription won't be created, and all entered data will be lost.
Please consider, that the steps provided so far focus on configuring an Auto-Renewable Subscription. However, if you intend to set up other types of in-app purchases, you can click on the In-App Purchases tab in the sidebar, instead of "Subscriptions." This will lead you to the section where you can manage and create various types of in-app purchases.
Add products to Adapty
Once you have completed adding your in-app purchases, subscriptions, and offers in App Store Connect, the next step is to add these products to Adapty.
Updated 5 months ago