
A/B test
Finding your app's winning formula: How to create A/B testing strategies for in-app purchases and subscriptions
Are you looking to boost your in-app purchases and subscription revenue? One effective way to optimize your offerings is through A/B testing. With Adapty you can easily create and manage A/B tests for different pricing strategies, subscription lengths, trial durations, and more. In this guide, we'll walk you through the steps of creating A/B tests in the Adapty Dashboard and analyzing the results to make data-driven decisions about your in-app purchases and subscriptions. Whether you're new to A/B testing or looking to improve your existing strategies, this guide will provide you with the tools and insights you need to maximize your app's revenue potential.
Important
Be sure you send paywall views to Adapty using the
.logShowPaywall().Without this method, Adapty wouldn't be able to calculate views for the paywalls within the test, which will result in the irrelevant conversion stats.
How to create an A/B test
When creating a new A/B test, you must have at least two paywalls in it. Each paywall in the test will have a weight, which represents the relative amount of users it will receive during the test.
For example, if the first paywall has a weight of 70% and the second paywall weighs 30%, the first paywall will receive approximately 700 users out of 1000, and the second paywall will receive approximately 300 users. The sum of all weights must be 100%.
By configuring your A/B test options and assigning weights to each paywall, you can more effectively test different paywalls, enabling data-driven decisions for your business.
When it comes to creating A/B tests in Adapty, you have several options to choose from. Depending on your goals and needs, you can create a new A/B test directly from the A/B test section, from a specific placement page, or from a paywall page. Here's a step-by-step guide on how to create an A/B test using each of these options.
Creating A/B test from A/B test section
This way of creating A/B tests would require some adjustments on the SDK side. Before stepping to the further steps, check out our doc on displaying products.
To create a new A/B test from the A/B tests section:
-
Open the A/B tests item from the Adapty main menu.
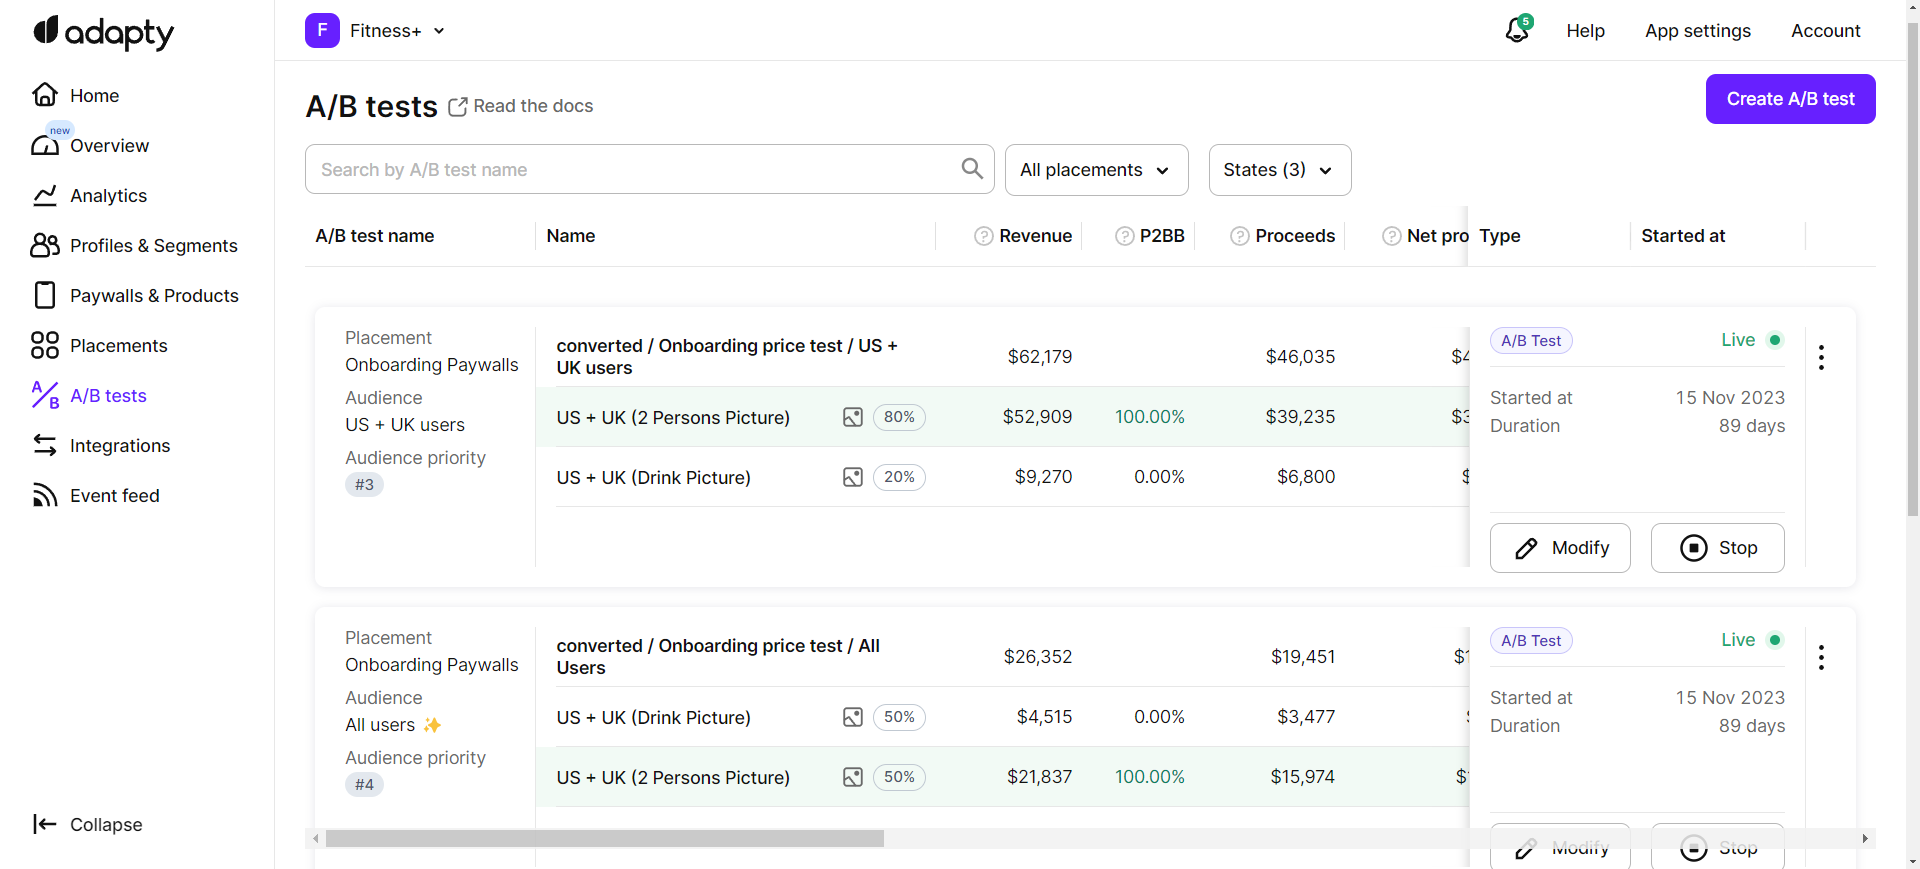
A/B tests list
-
In the A/B tests window, click the Create A/B test button located at the top right side of the page.
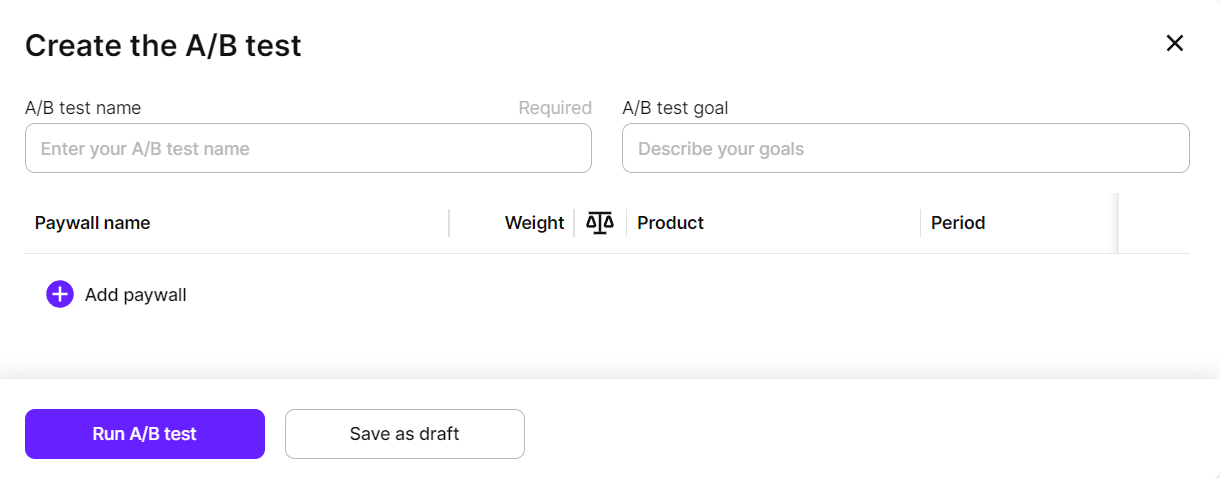
Create a new A/B test
-
In the Create the A/B test window, enter the A/B test name. This is a mandatory field and should be something that helps you easily identify the test in the future. Choose a name that is descriptive and meaningful, so you can quickly recognize the test when reviewing its results later on.
-
Enter the A/B test goal for your further reference. Clearly defining the goal will help you stay focused on what you're trying to achieve with the test. The goal could be related to increasing subscription sign-ups, improving user engagement, or reducing bounce rates, among other objectives. By setting a specific goal, you can align your efforts and measure the success of the A/B test accurately.
-
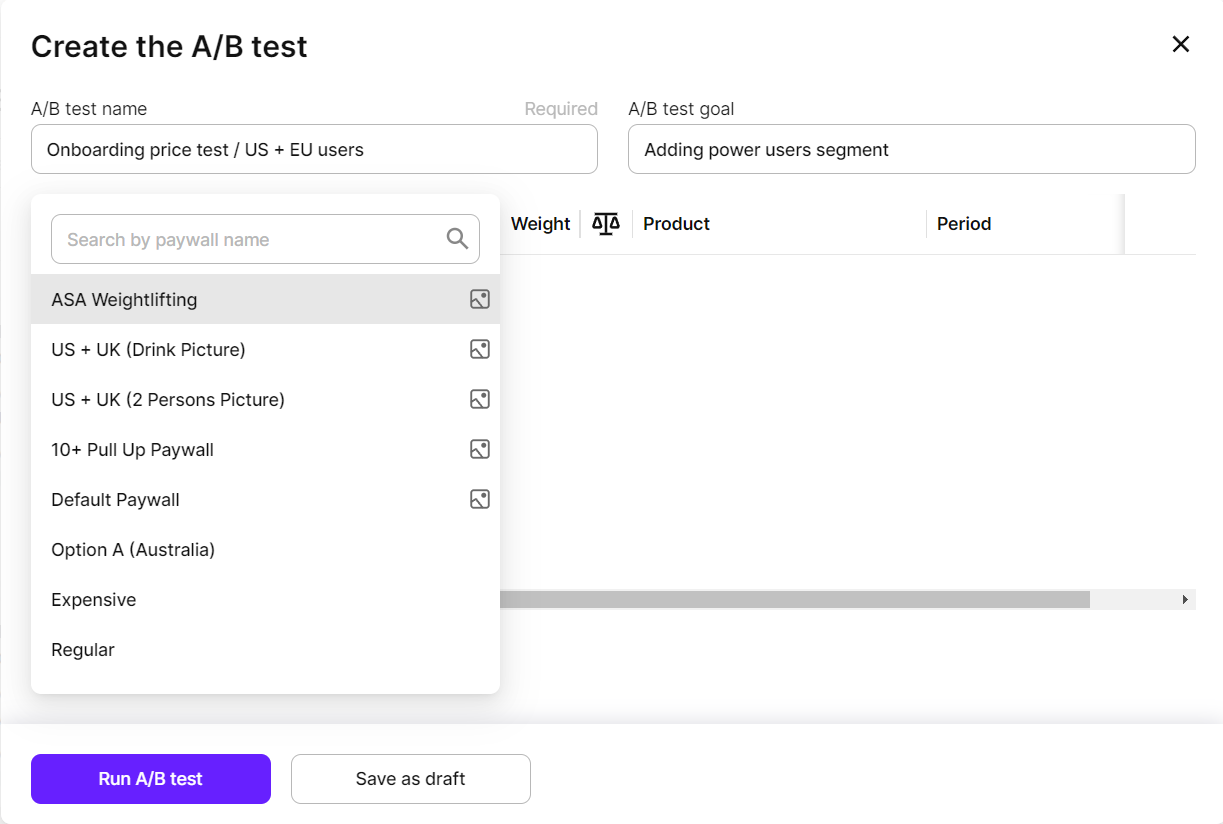
Click the Add paywall button.
Choosing paywalls to test
- Choose the paywalls you want to test and they will show in the Create the A/B test window.
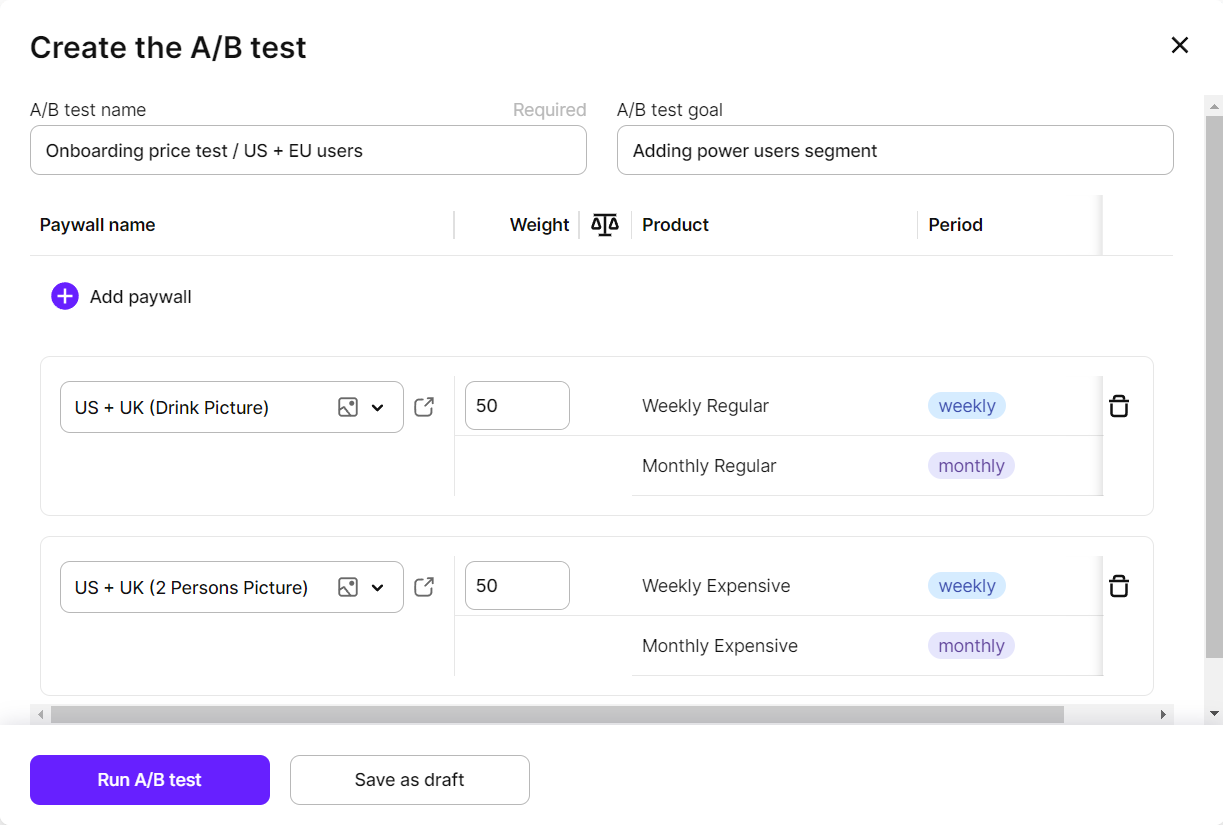
Chosen paywalls are shown in the A/B test
- You have two ways to save the new A/B test:
- You can choose to save the newly created paywall as a draft, which means the test won't be launched at once. You can run the test later from the placement or A/B test list. This option is suitable if you're not yet ready to make the test live and want to review and modify it further before implementation. If you choose this option, click the Save as draft button.
- Alternatively, you can choose to run the A/B test immediately by clicking the Run A/B test button. This will prompt you to select the placement and audience for which the A/B test will get live. Once you click the "Run A/B test" button, the A/B test will become active and live.
To learn more about running A/B tests and the process involved, you can refer to the documentation on running A/B tests. You'll be able to monitor and track the test's performance using various metrics. For more information on these metrics, please refer to the metrics documentation.
Creating A/B test from the placement
Another way to create an A/B test is to do it from the Placement detail page. To get started, navigate to the detail page of the corresponding placement. Here, for each selected audience you have two options: you can choose to show any paywall to the users in that audience by selecting a paywall, or you can choose to run an A/B test by selecting the corresponding option.
If you're not familiar with Placements, you can learn more about them in our documentation.
For creating a new A/B test you should click on the Create A/B test button for the corresponding audience. The rest of the process is similar to creating an A/B test from the A/B test section.
You'll be prompted to choose whether you want to select an existing paywall group or create a new A/B test from scratch. If you choose to create a new A/B test, you can add your desired paywalls in the creation modal by clicking the "Add Paywall" button.
Once you've added your paywalls, you can assign weights to each option to control how often they appear during the test. You can also set a test goal to track your progress and determine which paywall performs best with your audience.
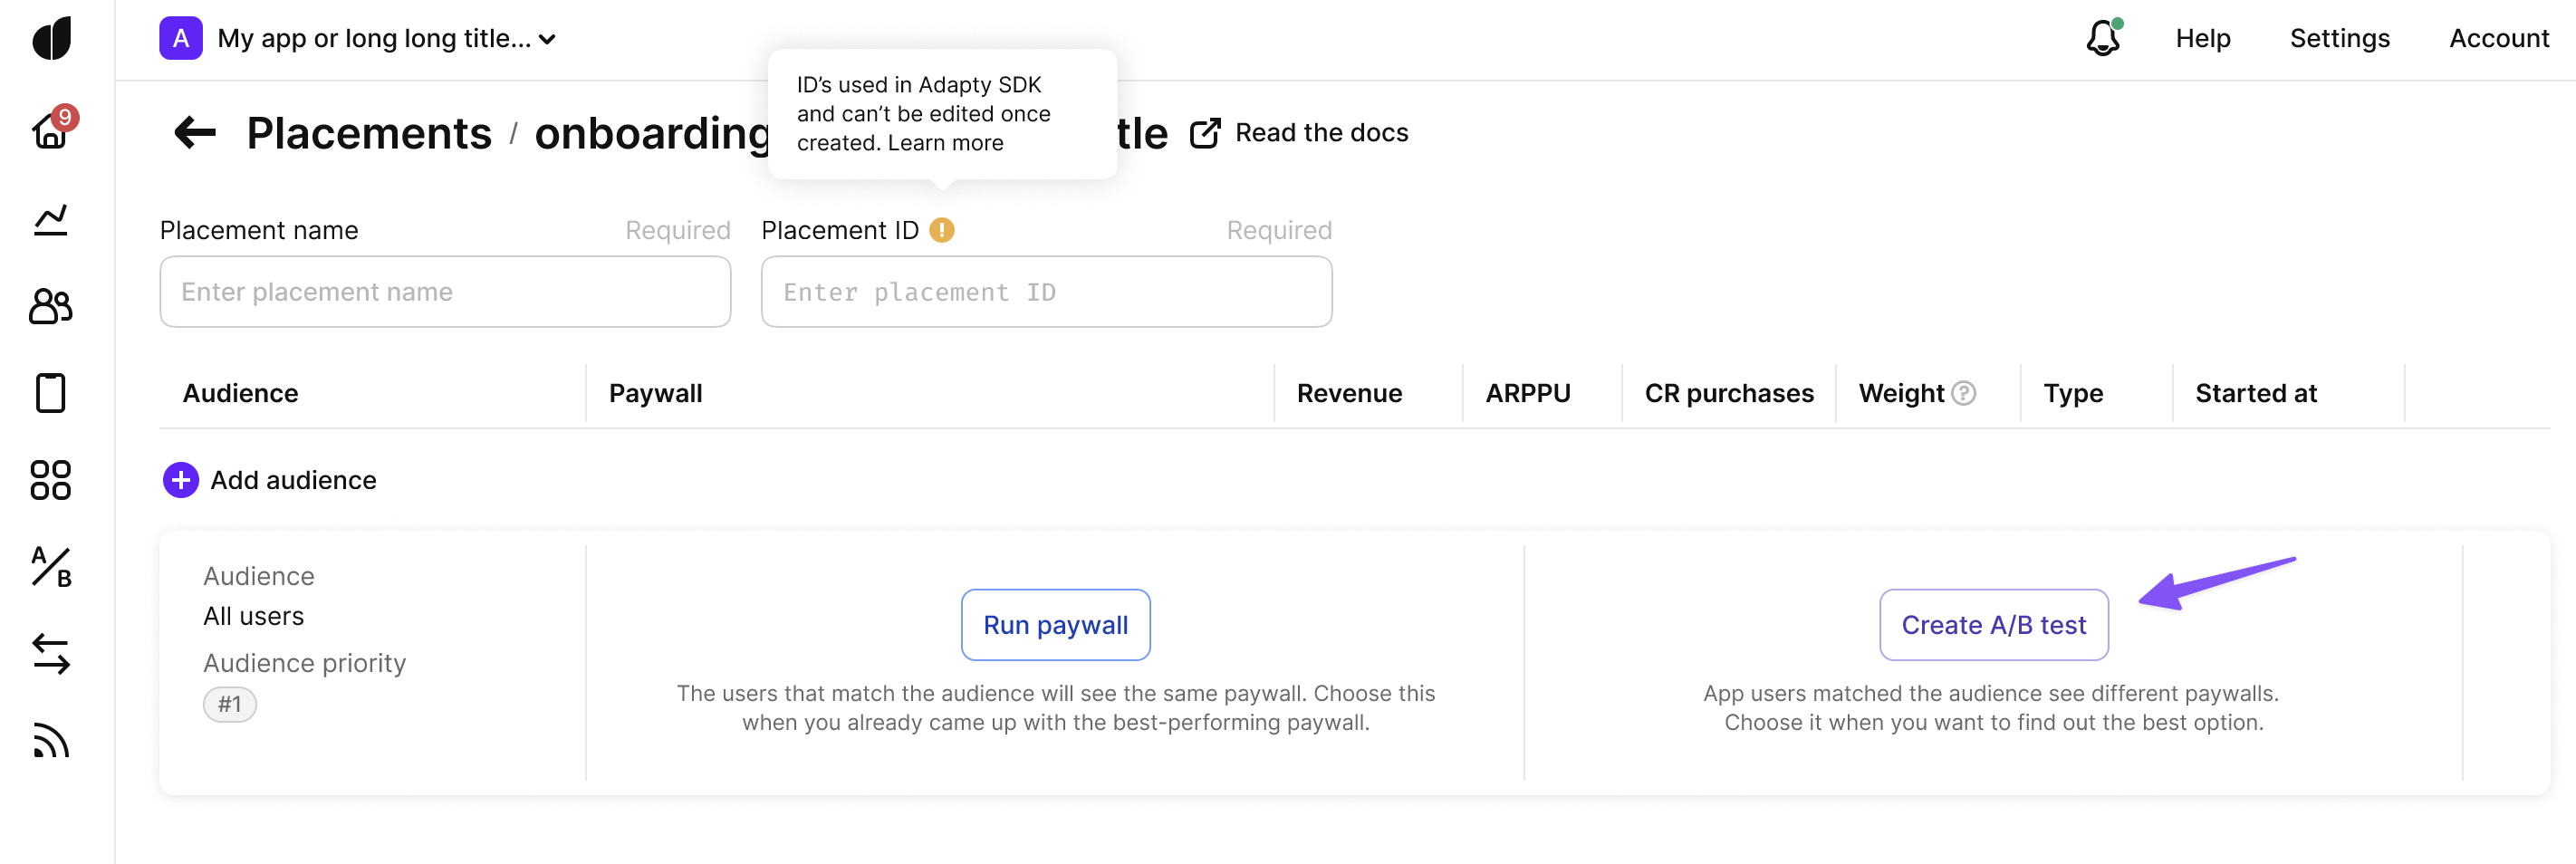
Create an A/B test from the Placement detail page
Once you've created your A/B test and saved the placement, it will be available in the corresponding placement of your app and displayed for the selected audience.
This means that users in the selected audience will see the paywalls included in the A/B test as they interact with your app. The weights assigned to each paywall option will determine how often each paywall appears during the test, allowing you to collect data on which paywalls perform best with your audience.
You can monitor the progress of your A/B test in the dashboard and make adjustments as needed to improve your results. One way to do this is by checking the metrics of the placement. You can learn more about placement metrics in this doc [insert link].
By setting up an A/B test from the Placement detail page, you'll be able to more easily test different paywalls with specific audiences and get valuable insights into what works best for your business.
Updated 17 days ago