
Design paywalls with new Paywall Builder (Beta)
Discover how to use the new Paywall Builder, a user-friendly, no-code tool, to effortlessly design and customize in-app storefronts, with no technical or design expertise
We’re excited to introduce the Beta version of our new Paywall Builder, compatible with Adapty SDK v3.0 and later! This advanced no-code tool makes creating custom paywalls more intuitive and powerful than ever, allowing you to craft beautiful, engaging paywalls with ease—no technical or design expertise required!
Key Features of the New Paywall Builder
- Expanded Template Selection: Choose from a wide array of professionally designed templates to kickstart your paywall creation. These templates offer various styles and layouts to meet different needs and preferences.
- Enhanced Flexibility: Enjoy greater flexibility with the ability to use design layers and new elements like carousels, cards, product lists, and footers. These enhancements give you the creative freedom to build any type of paywall you envision.
- Revamped Existing Elements: Existing elements have been significantly improved, offering more options and capabilities to bring your paywall ideas to life.
This section describes the new Paywall Builder (Beta). For information on the legacy Paywall Builder compatible with Adapty SDK v2.x or earlier, see Design paywalls with legacy Paywall Builder.
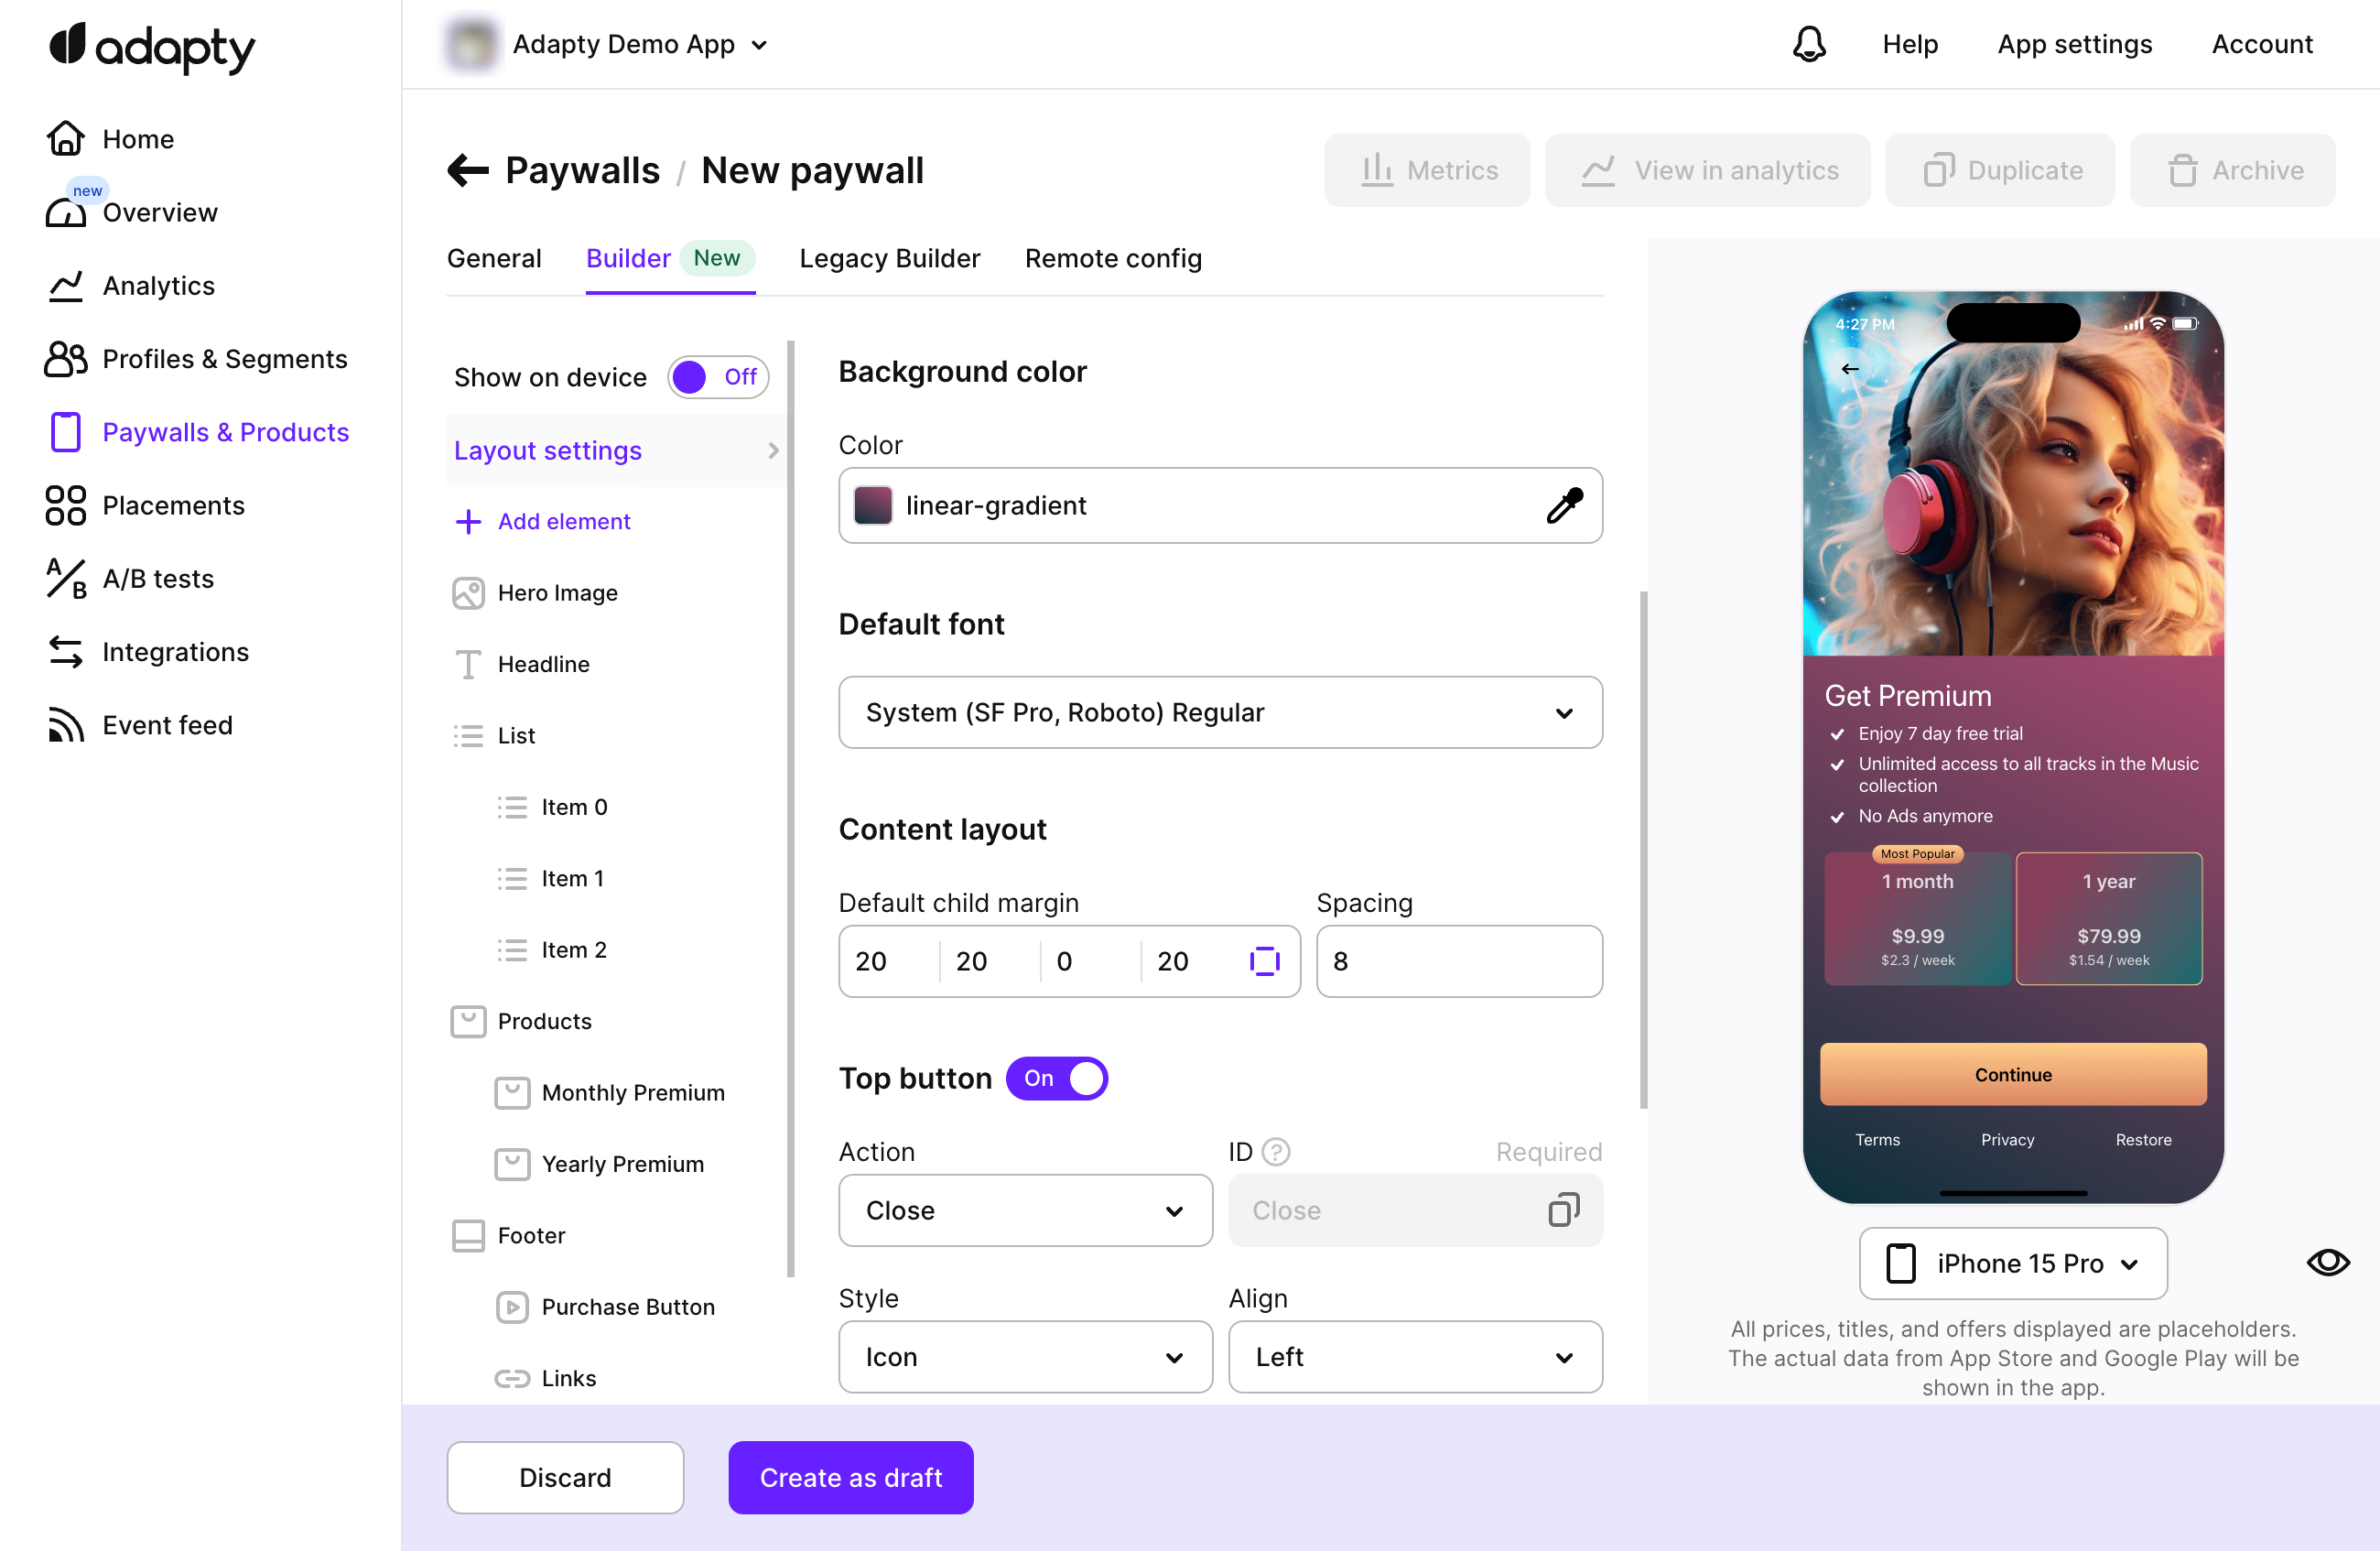
Structure of a paywall
In the new Adapty Paywall Builder, a paywall is composed of the following:
- Layout: This is the foundational layer of the paywall, setting the background color and defining how products are displayed and top buttons positioned.
- Hero Image: The main picture of the paywall.
- Main Area: Here, you can place various elements like a product block, carousels, images, cards, texts, buttons, and lists.
- Footer: Similar to the main area but it's a container that's always sticking to the bottom of the paywall on top of the main area. You can add as many elements as needed, and they will be arranged from top to to bottom inside a footer in the same order shown in the left pane.
- Elements: The building blocks placed in the main area or footer to create your paywall. They are stacked in the order they appear in the left pane, from top to bottom. You can nest elements within each other, combine them into cards, or display them in a carousel.
How to start designing a paywall with new Paywall Builder
The new Paywall Builder is available for iOS only and requires Adapty SDK v3.0 or later. Please make sure you've upgraded to Adapty SDK v3.0 or later for your new paywalls to function properly!
To use the Adapty Paywall Builder:
-
Open the Products and Paywalls section in the Adapty main menu and click the Paywall tab to open it.
-
Click the Builder tab to open it.
-
Depending on whether you've added the products to the paywall in the General tab or not, Adapty will offer you to add products or build your paywall with the new Paywall Builder. We continue with the case when products are already added. Click the Build no-code paywall button to start designing your paywall.
-
In the Choose a template window, you'll find a selection of paywall templates designed by professionals, ready for you to pick the one that best suits your needs. We have both templates that require a couple of minor adjustments like your logo to launch as well as as well as templates with a minimal design that give full scope for your creativityю Choose the template that fits your design the most.

-
Click the Choose button to confirm your choice.
-
By leveraging the Adapty Paywall Builder, you can create persuasive paywalls that seamlessly align with your app's branding and purpose based on the selected template.
How to migrate your paywalls
Currently, in Adapty two versions of the Paywall Builder work in parallel:
- The new version is located in the Builder tab of the Paywall functionality in the Adapty Dashboard. That is the most recent and flexible version that provides you with many design features to build your perfect paywalls.
The paywalls designed with this Paywall Builder version require Adapty SDK v3.0 or later. - The legacy version is located in the Legacy Builder tab of the Paywall functionality in the Adapty Dashboard. This version is outdated and should be used only to support app versions with installed SDK below v.3.х.х. We do not recommend using it for new paywalls as it will be deprecated soon.
The migration of a paywall from the lagacy Paywall Builder to the new one means that a new version of your paywall will be created in the Builder tab of the paywall. This version can be edited with the new Paywall Builder and will be displayed in the apps with installed Adapty SDK v3.0 or later. See Migration guide to Adapty SDK v.3.x or later for detailed reference for upgrading to Adapty SDK v3.0.
The existing version of your paywall will stay in the Legacy Builder tab, you will be able to continue adjust it with legacy Paywall Builder and it will be displayed in the apps with the installed Adapty SDK version 2.x or earlier.
Therefore, you will have paywalls in both Paywall Builder formats in parallel and separately until you need them. Changes made with the paywall configuration made for one version will not affect the configuration build for another one.
To migrate a paywall to new Paywall Builder:
-
Open the paywall you want to migrate.
-
Open the Builder tab.
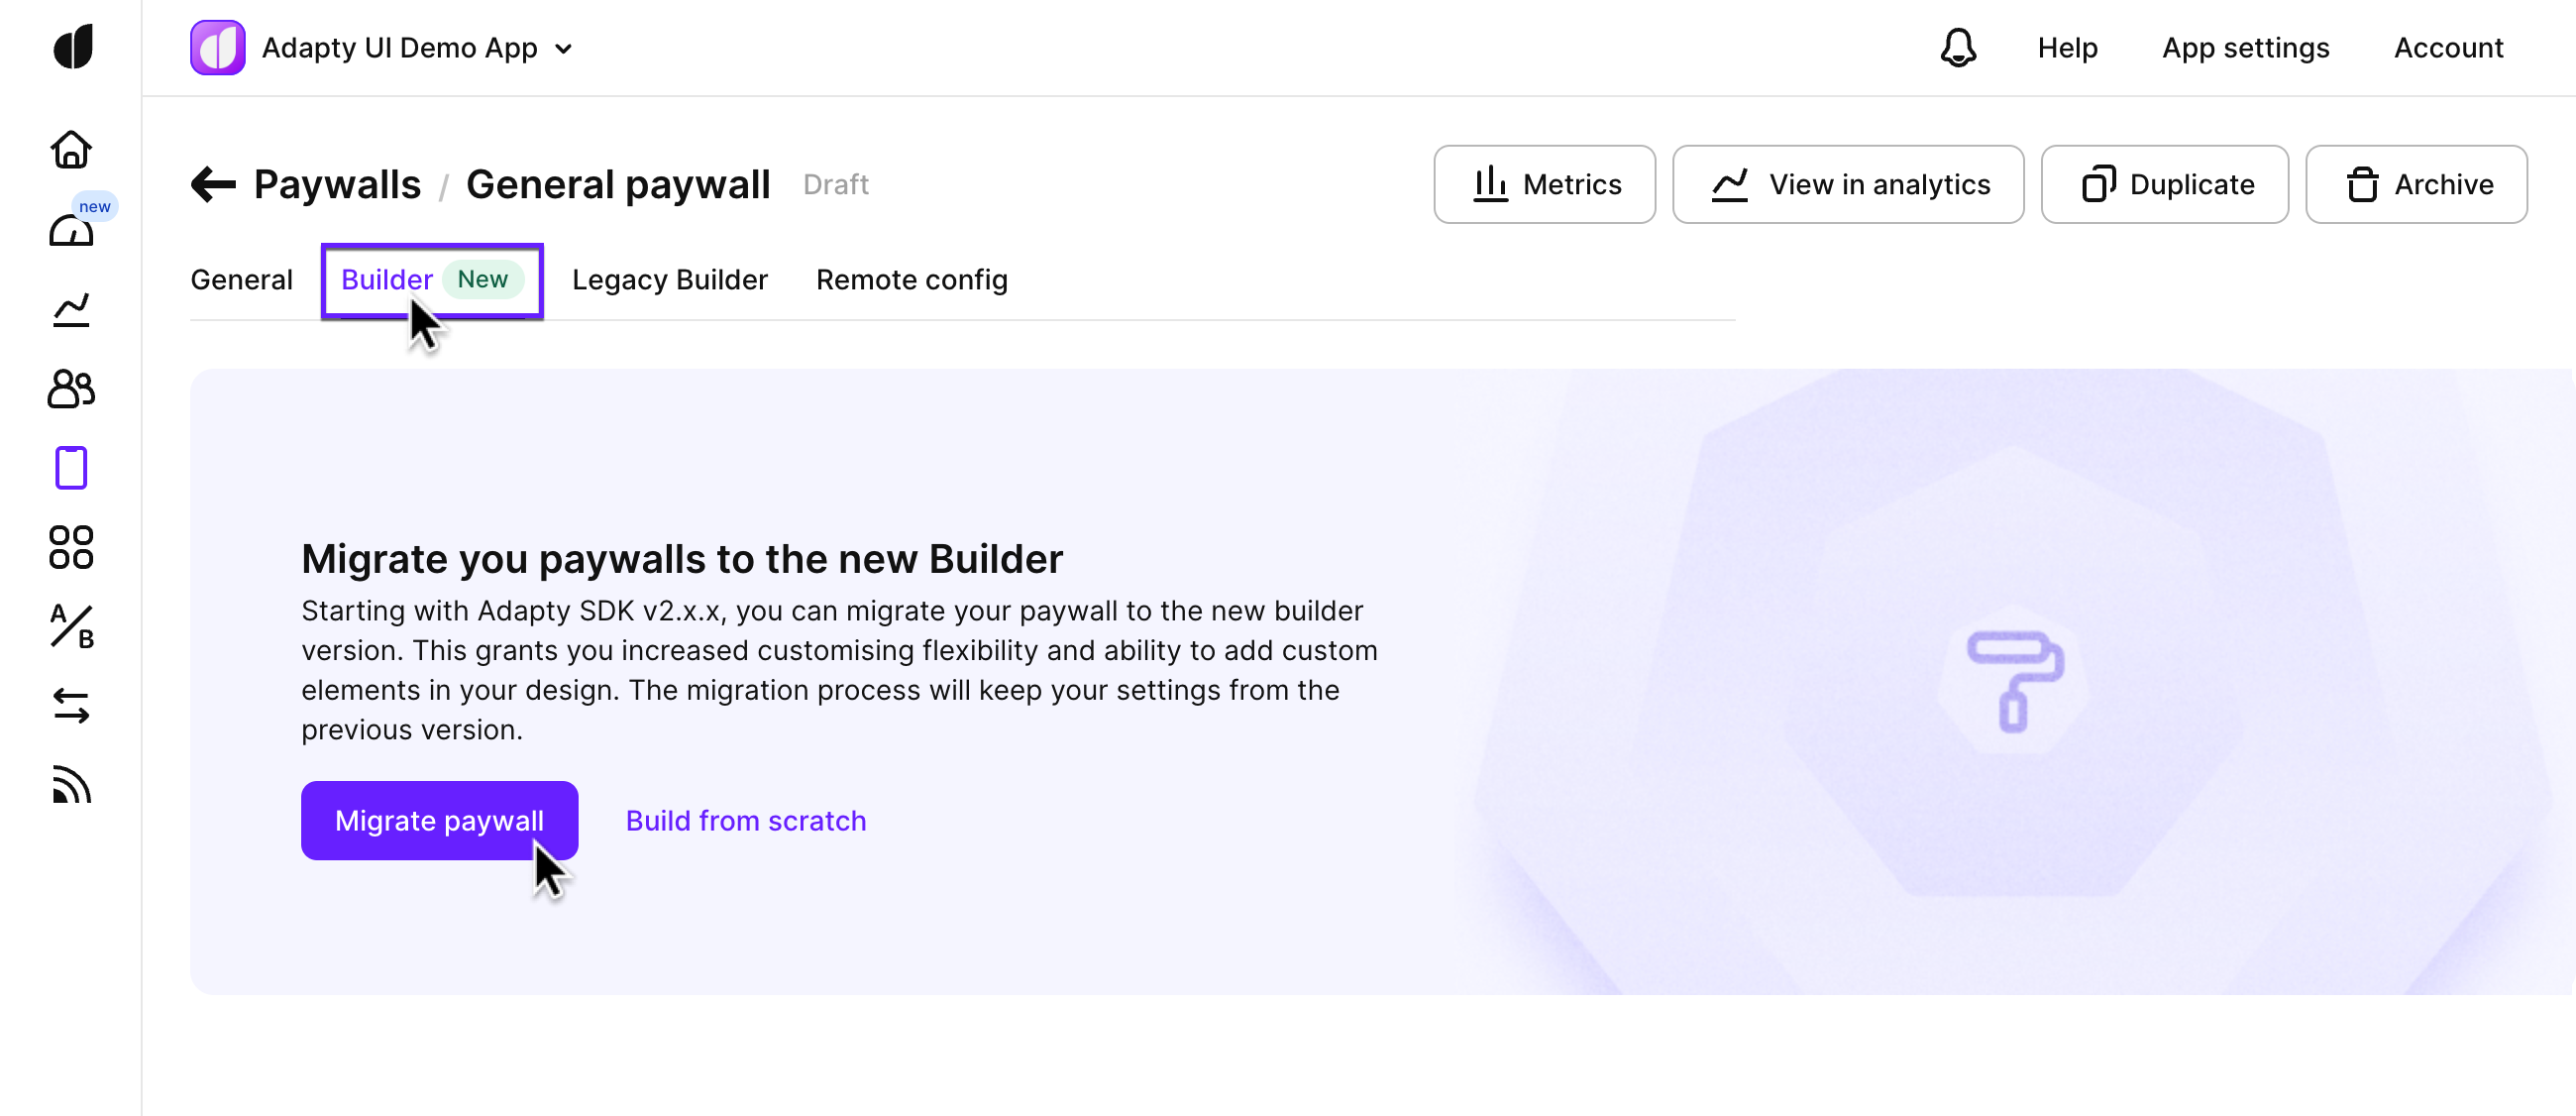
-
Click the Migrate paywall button.
-
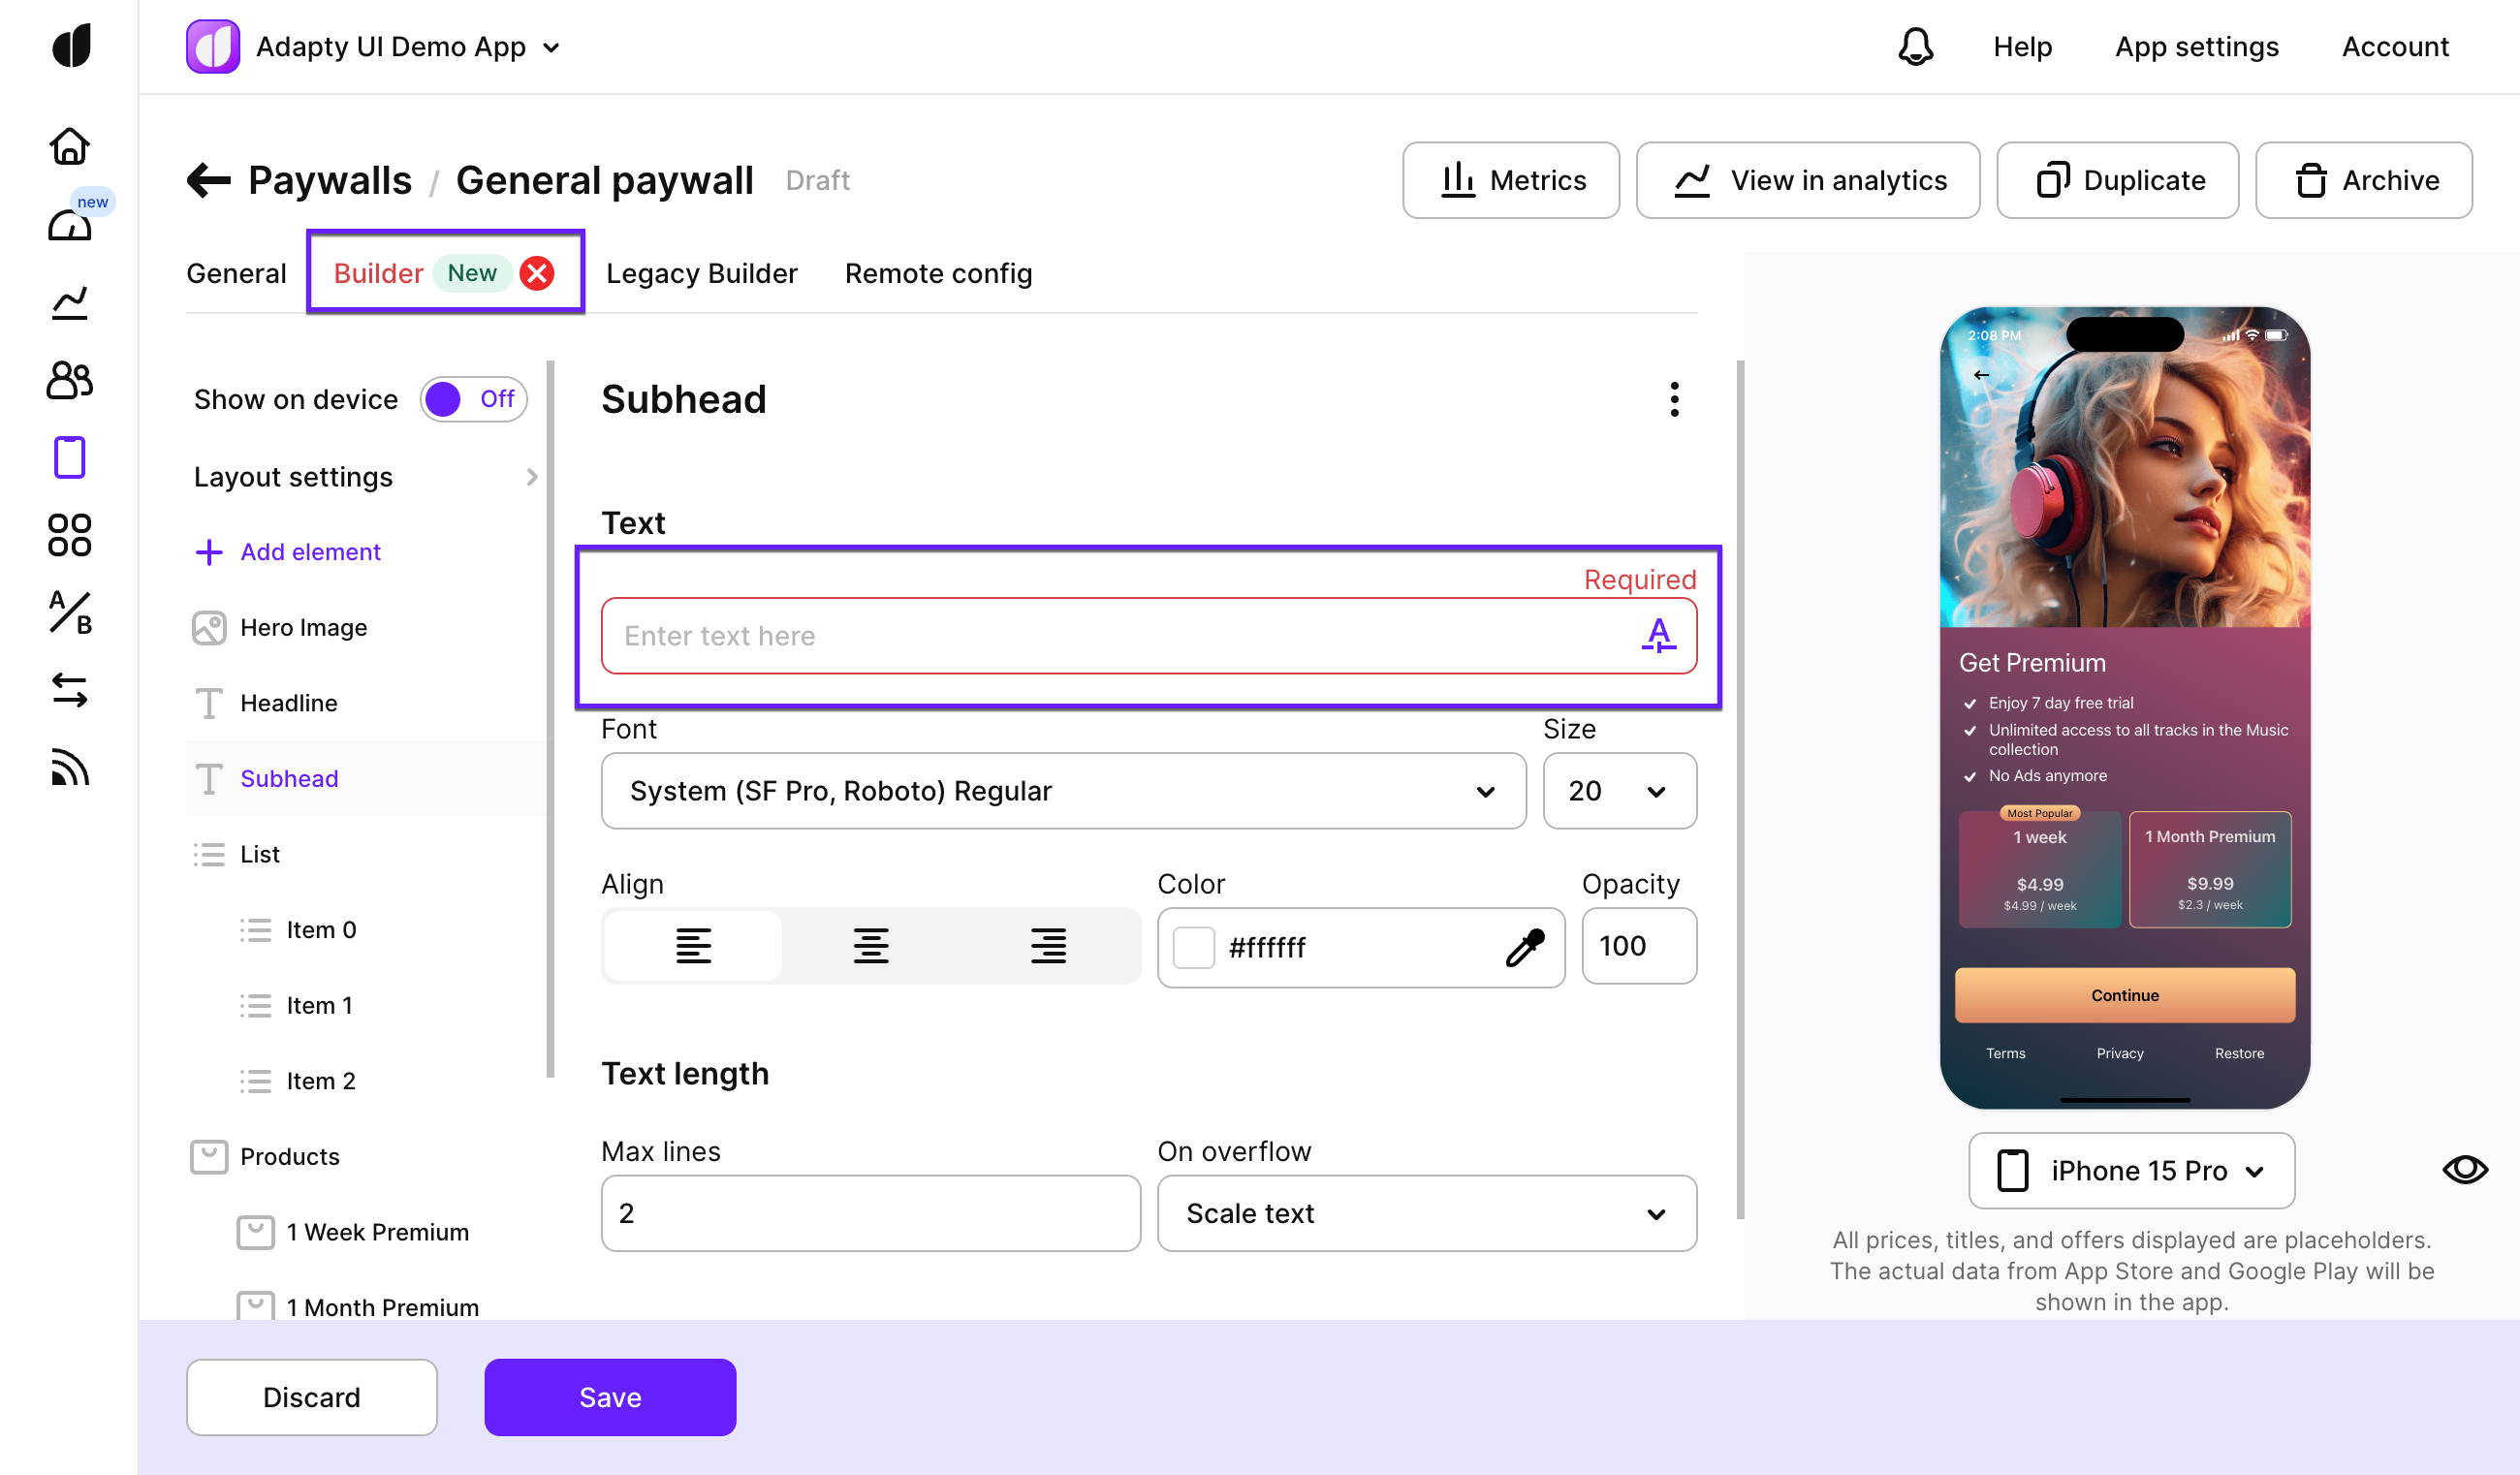
After the migration is done, review the result, make sure the paywall looks as it should. If not, correct it.
-
Click the Save button.
-
If there are some issues, they will be highlighted red and you will see them at once. Fix them and save the paywall again.
You can migrate your paywalls one by one so that you could review and fix if necessary.
Paywall elements
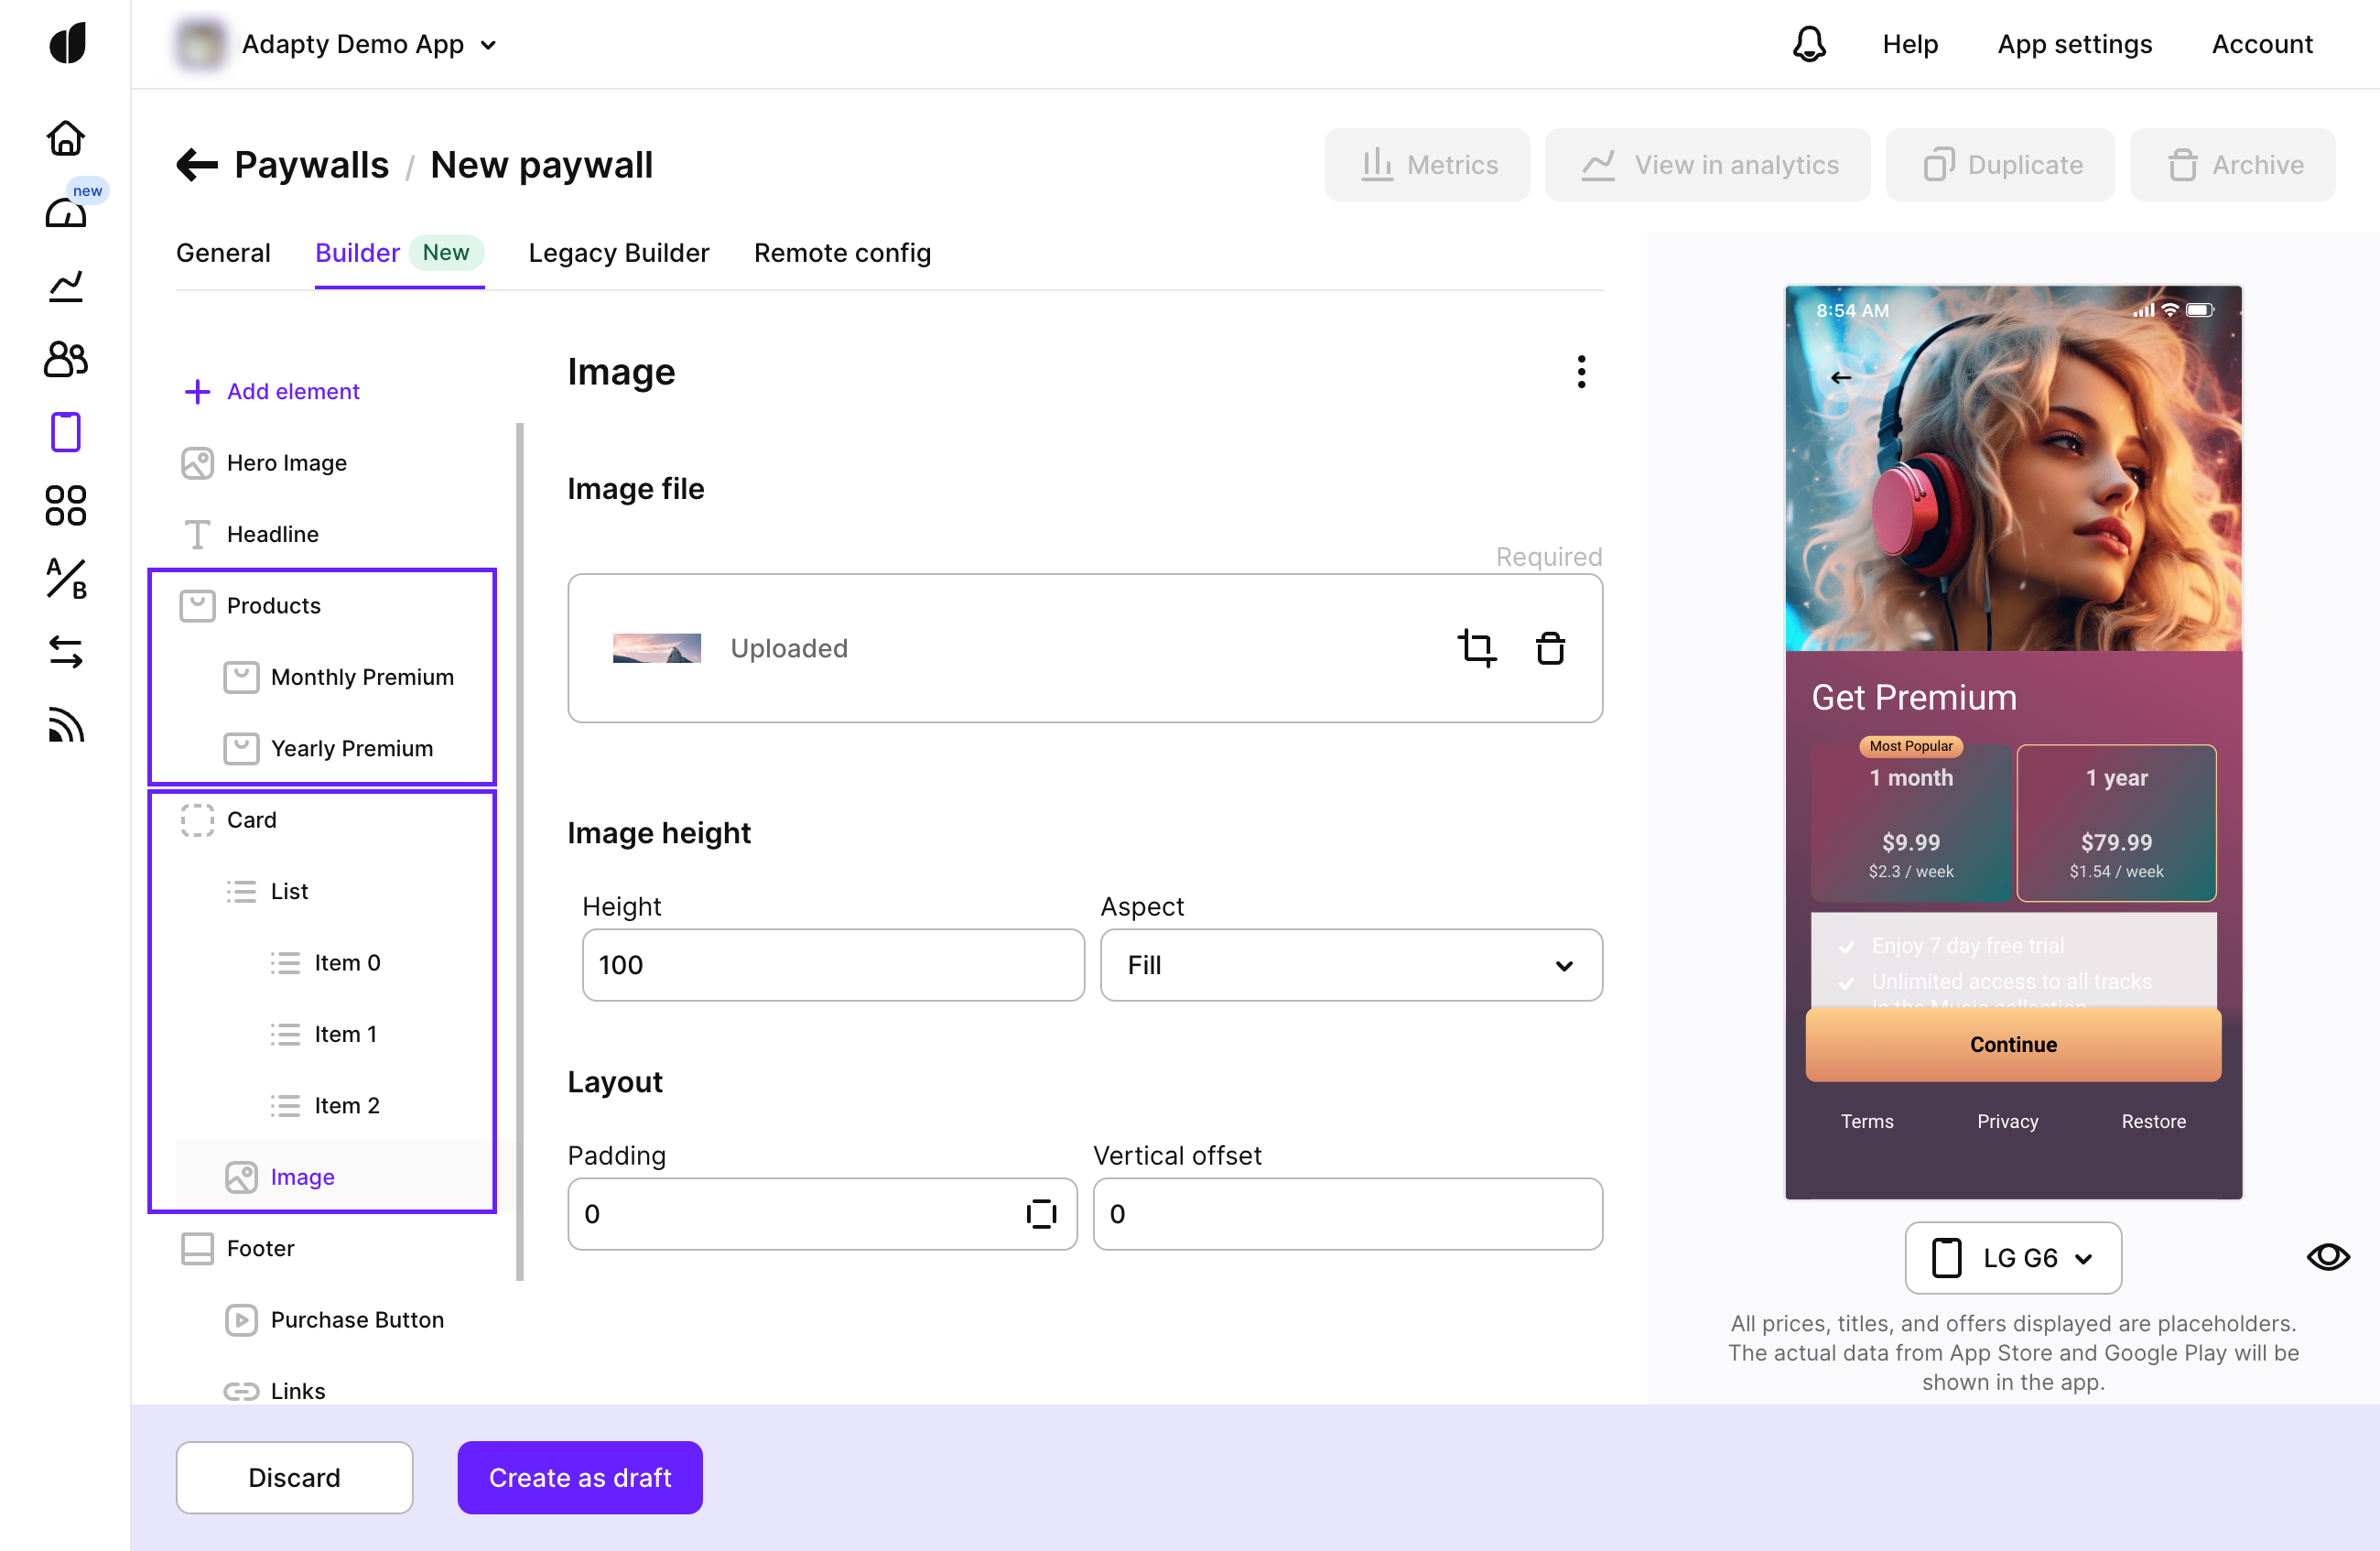
The elements you add to your paywall appear in the left pane of the Paywall window. Their order in this pane reflects their order on the paywall.
Paywall elements in Adapty are categorized as simple or compound:
- Simple Elements: These are individual items that cannot contain other elements. Examples include text, images, and buttons..
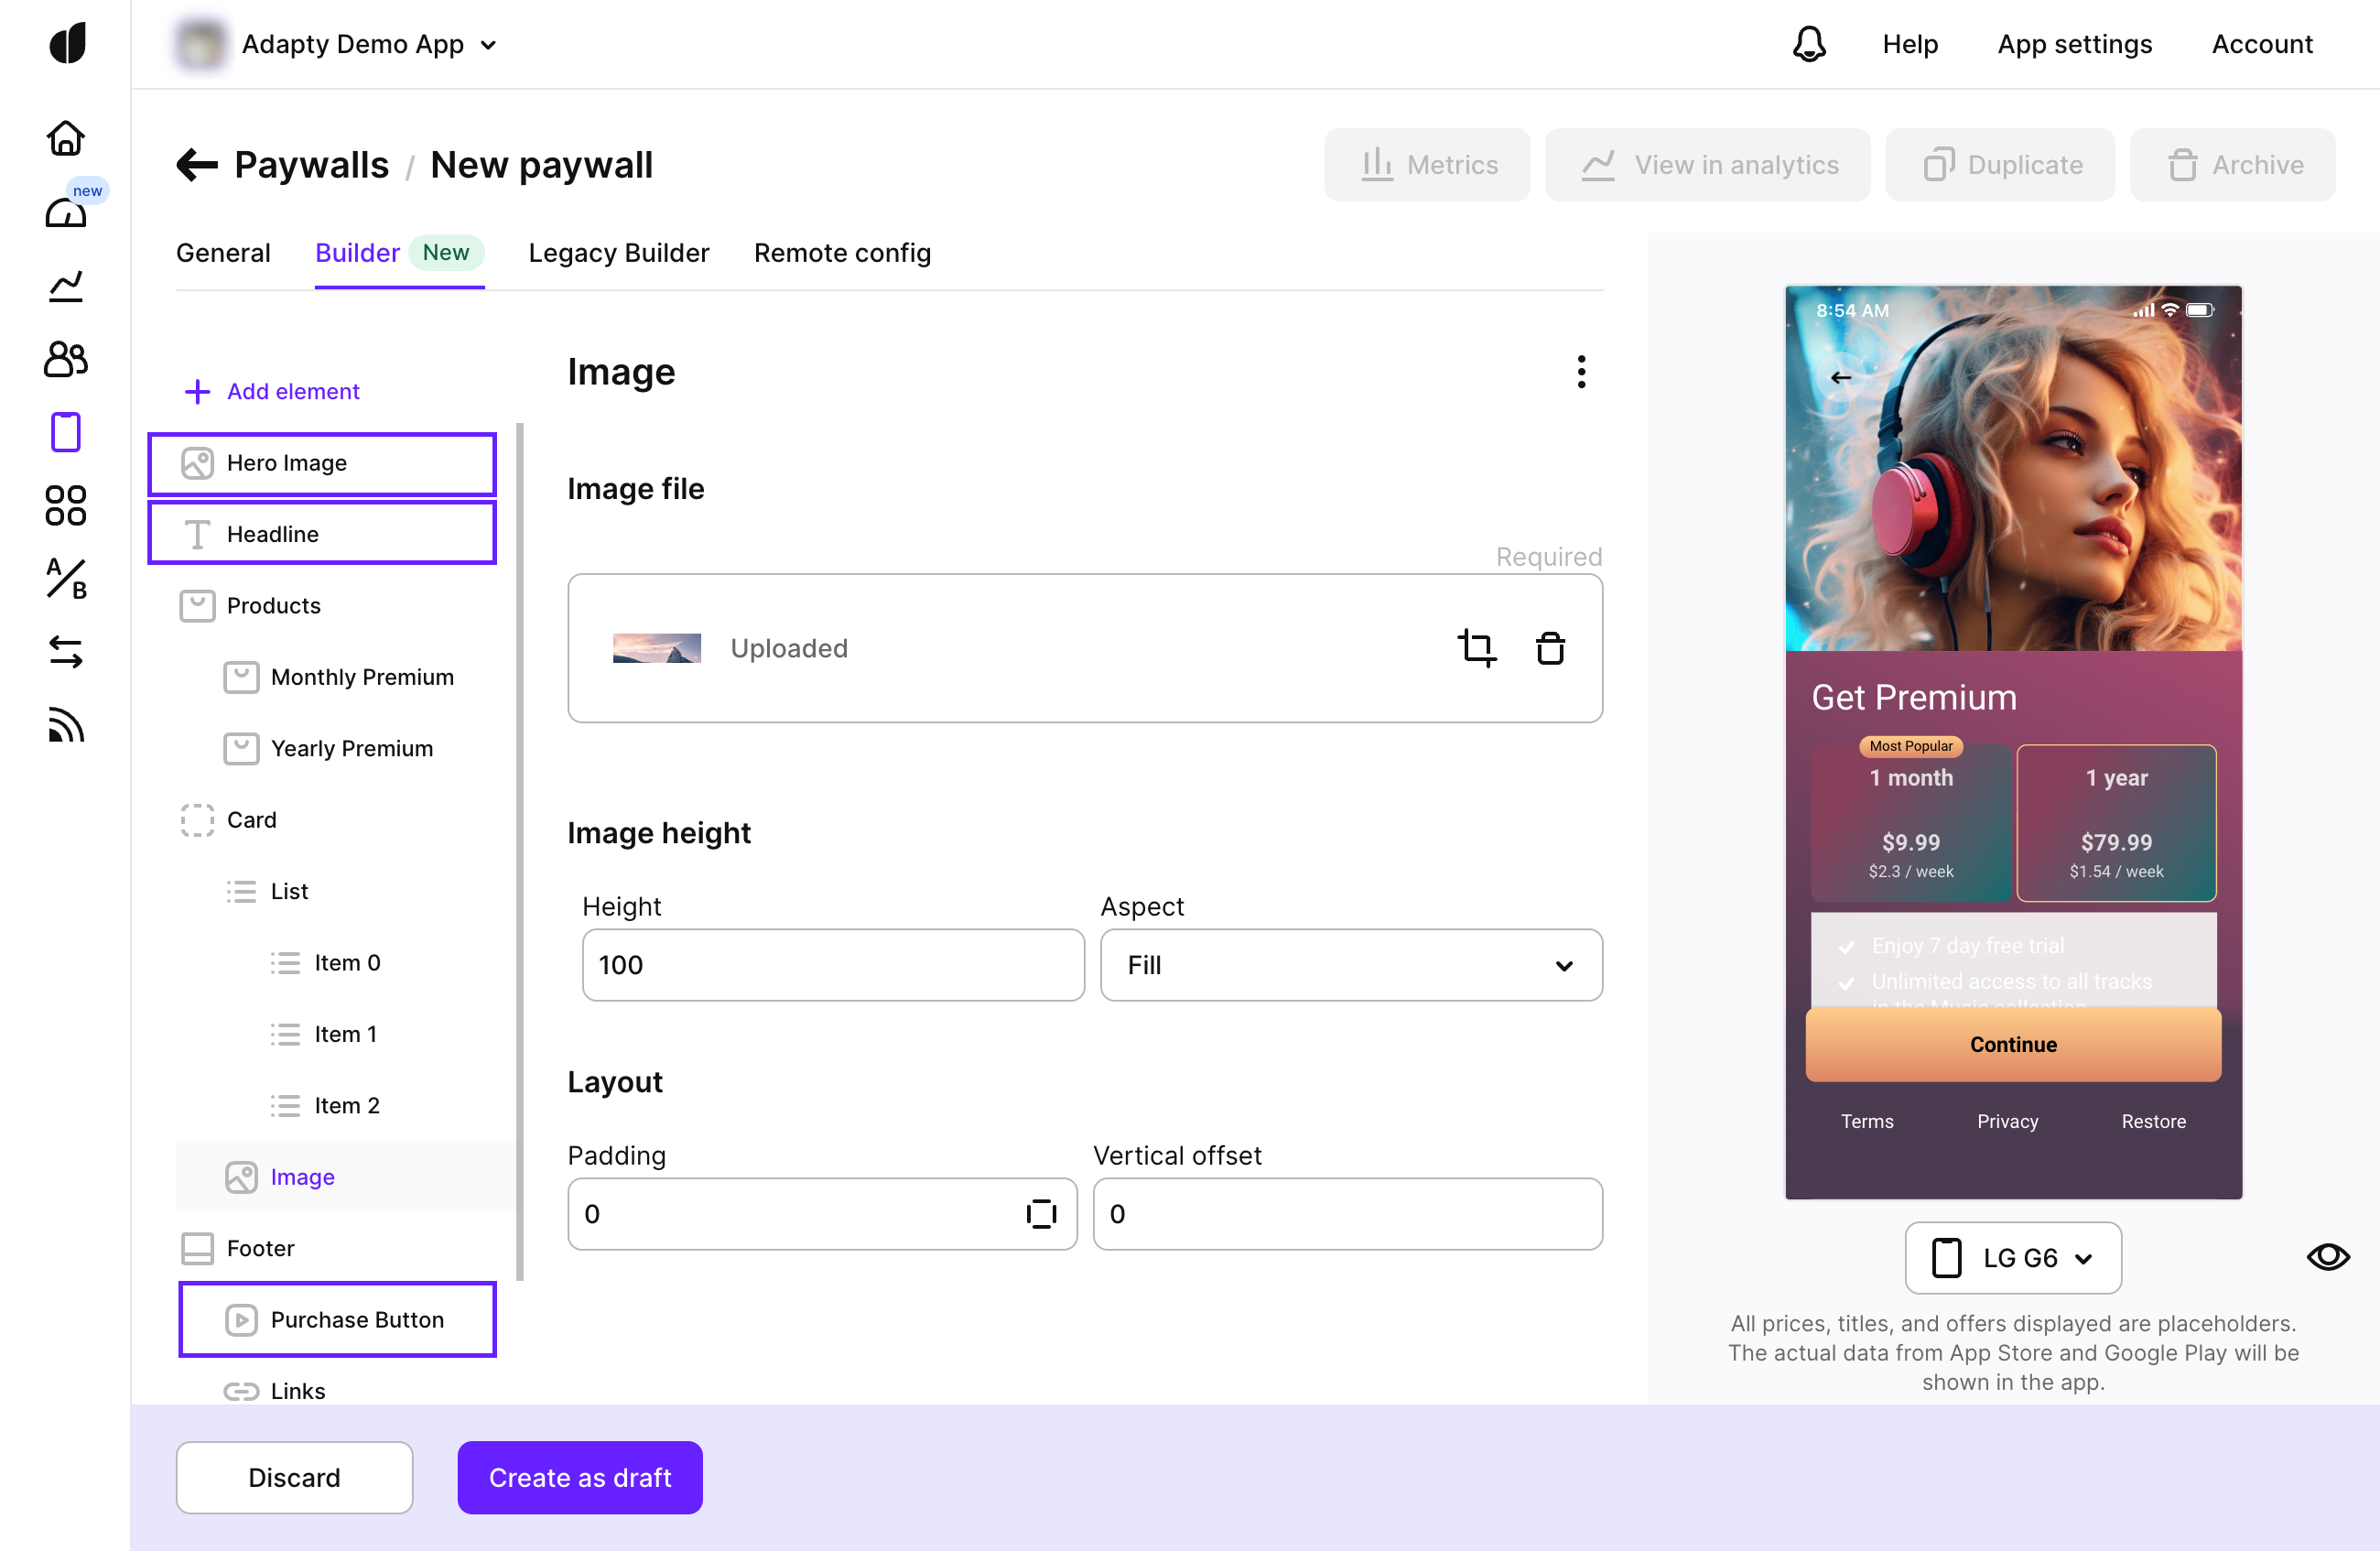
Simple elements
- Compound Elements: These can contain other elements or have their own structure. Examples include:
- Product lists with products
- Carousels with child elements
- Cards with child elements
- Lists with its list items
- Link blocks with links inside
Enhancements you can add include:
Once configured, you can add paywalls to placements to display them in your mobile app. For more details on displaying paywalls, see Display Paywall Builder paywalls.
Customization Options
You can set up each element flexibly:
- Style tab: Adjust the element's size, appearance, background color or image, frame, and transparency. Additional options like page control and slideshow settings are available for certain elements, such as carousels.
- Layout tab: Set the element’s position and its child elements' positions using offset (moving an element without changing its size or the parent’s size) or padding (moving the element with possible resizing of the parent to fit the child’s size and position).
- Contents tab: Configure the content of compound elements.
We Value Your Feedback
As we’re in the Beta phase, your feedback is invaluable to us. If you encounter any issues or have suggestions for improvements, please reach out to us. We’re here to support you and enhance your experience with the new Paywall Builder.
📧 Contact Us: Adapty Support
Enjoy building with the new Paywall Builder, and take your monetization strategy to the next level with our enhanced tools and features!
Updated 8 days ago